Beginner Photography Settings (Where to Start)
Most people don’t struggle with photography because it’s complicated — they struggle because they’ve been given too many things to think about at once.
Aperture, shutter speed, ISO, focus modes, white balance… it quickly turns into a list of settings that feel disconnected and overwhelming.
So instead of making decisions, most beginners either guess or stay in auto and hope the camera gets it right.
The problem is, the camera doesn’t know what matters in your scene.
Once you simplify the process and focus on just a few key settings, everything becomes easier — and your photos start to improve much faster.
Getting started with beginner photography settings doesn’t require memorising dozens of controls or understanding every feature on your camera. What matters is knowing which settings actually affect your photos and how to adjust them with confidence.
Most beginners are taught photography in a way that feels technical and disconnected from real shooting situations. You learn what each setting does, but not how to use them together when you’re actually taking photos.
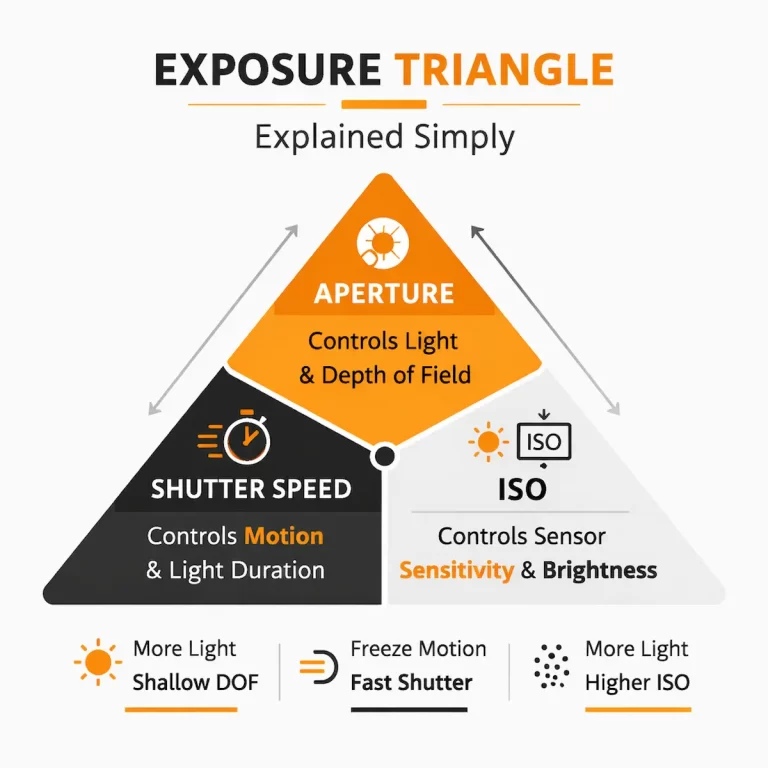
If you’ve already come across the camera settings explained guide, you’ll know that only a small number of controls make a real difference. These settings work together as part of the exposure triangle explained, but you don’t need to overcomplicate that idea to start seeing better results.
This guide focuses on simplifying beginner photography settings into practical choices you can use immediately. Instead of trying to get everything perfect, the goal is to give you a clear starting point that works in most situations.
Once you understand these basics, you can start adjusting your settings based on what you’re trying to capture, rather than relying on guesswork.
Why Beginners Overcomplicate Photography
One of the biggest challenges with beginner photography settings isn’t the camera itself — it’s the amount of information beginners are given all at once.
Most people start by trying to learn everything. Aperture, shutter speed, ISO, focus modes, metering, white balance, picture profiles. Each setting is explained individually, often in technical detail, but without a clear sense of what actually matters when taking a photo.
This creates a common pattern. Instead of building confidence, beginners become hesitant. They second-guess their settings, adjust too many things at once, or default back to automatic mode because it feels safer.
The issue isn’t a lack of ability — it’s a lack of prioritisation.
In reality, most photos are controlled by just a few key decisions. The rest of the settings either support those decisions or have only a small impact on the final image. This is something that experienced photographers learn over time, but it’s rarely explained clearly at the beginning.
Photography education platforms such as Nikon Learn & Explore consistently emphasise learning how settings interact in real situations, rather than treating them as isolated controls. That shift in thinking is what makes photography feel manageable.
If you’ve already explored travel photography settings, you’ll have seen how simplifying your setup makes it easier to react to real moments without hesitation.
The goal here is not to remove complexity entirely, but to reduce it to something usable. When you focus on a small number of settings and understand what they do, you stop guessing and start making clearer decisions.
That’s when photography begins to feel more natural — and your results start to become more consistent.
The 5 Camera Settings That Matter Most
When it comes to beginner photography settings, most of the confusion comes from trying to learn too many controls at once. In reality, only a small number of settings have a direct impact on how your photos look.
If you focus on these first, everything else becomes easier to understand.
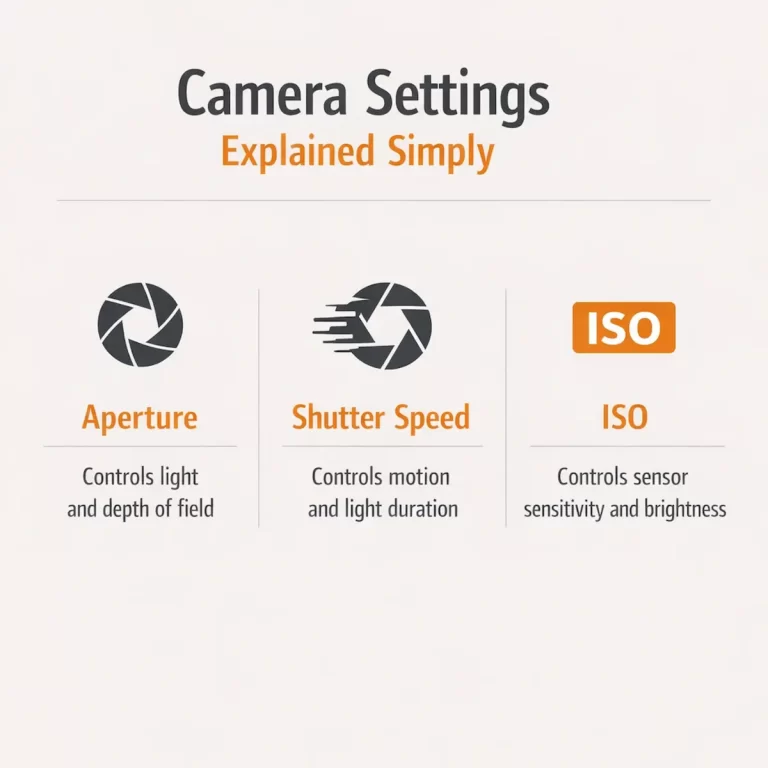
The five camera settings that matter most are:
- Shutter Speed – controls motion
- Aperture – controls depth of field
- ISO – controls brightness
- Focus – controls what is sharp
- White Balance – controls colour tone
The first three — shutter speed, aperture, and ISO — form the foundation of exposure. They work together to determine how bright your image is, but they also affect how the photo looks in terms of motion and depth. This is the same relationship explained in the exposure triangle explained guide, but here the goal is to keep it practical rather than technical.
Focus is what determines where attention is placed in the image. If the wrong part of the scene is sharp, the photo often doesn’t work, even if your exposure is correct. Keeping your subject in focus is one of the simplest ways to improve your results immediately.
White balance is often overlooked, but it controls how warm or cool your image appears. In most situations, leaving this on auto is perfectly fine when you’re starting out. You can refine it later once you’re comfortable with the core settings.
What matters most is understanding that these settings are not separate decisions. They work together.
For example, if you increase your shutter speed to freeze movement, you may need to adjust ISO to maintain brightness. If you open your aperture to isolate a subject, you may need to compensate with shutter speed.
If you’ve already worked through camera settings explained, you’ll recognise how these relationships start to simplify once you stop treating each setting in isolation.
As a beginner, your goal isn’t to master all five at once. It’s to understand what each one does, and then start using them together in simple, consistent ways.
Easy Camera Settings for Daylight
Daylight is the easiest place to start when learning beginner photography settings, because you have plenty of light to work with and fewer technical limitations. This allows you to focus on making simple decisions without worrying about pushing your camera too far.
A reliable starting point for most daylight situations is:
- Shutter Speed: 1/250
- Aperture: f/5.6 to f/8
- ISO: 100–200
These settings give you a strong balance between sharpness, depth, and image quality. A shutter speed of 1/250 is fast enough to handle general movement, while an aperture between f/5.6 and f/8 keeps enough of the scene in focus without requiring precise adjustments. Keeping ISO low ensures clean images with minimal noise.
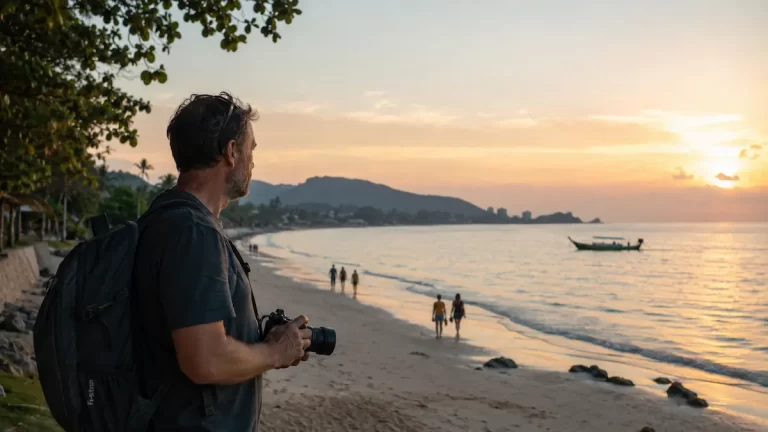
This combination works well for everyday photography — walking through a city, capturing travel moments, or taking casual photos outdoors.
The goal here isn’t to find perfect settings for every situation. It’s to have a dependable starting point that allows you to focus on what you’re photographing, rather than constantly adjusting your camera.
From this base, you can make small changes depending on what you need. If your subject is moving faster, increase your shutter speed. If you want more background blur, open your aperture slightly. If the light drops, raise your ISO.
If you’ve explored travel photography settings, you’ll recognise that many of the same principles apply here. The difference is that in daylight, you have more flexibility and fewer constraints.
This is why daylight is the best place to build confidence. You can take your time, make adjustments, and start to understand how each setting affects your photos without the pressure of difficult conditions.
Once this starts to feel natural, you’ll find it much easier to adapt when the light changes or the situation becomes more challenging.
Download the Beginner Photography Cheat Sheet to remember these settings when you’re out shooting.
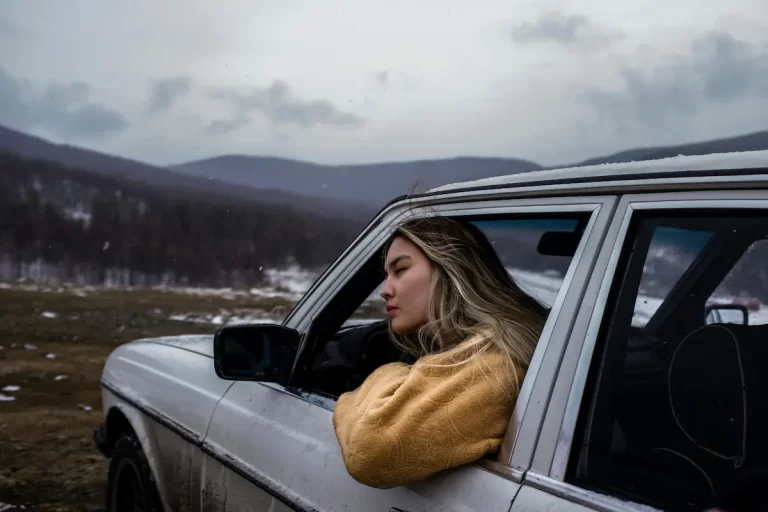
Easy Camera Settings for Low Light
Low light is where many beginners lose confidence with their beginner photography settings, because the camera starts to struggle and the results become less predictable. Photos come out blurry, too dark, or full of noise, and it’s not always clear which setting is causing the problem.
The key difference in low light is simple: there isn’t enough light to support fast shutter speeds and low ISO at the same time. This means you need to make trade-offs.
A practical starting point for low light situations is:
- Shutter Speed: 1/125 (or higher if needed)
- Aperture: f/2.8 to f/4 (or as wide as your lens allows)
- ISO: 800–1600+
Lowering your shutter speed slightly allows more light into the camera, but if you go too slow, you risk blur from movement or camera shake. A shutter speed around 1/125 is often a good balance for general handheld shooting, though you may need to go faster if your subject is moving.
Opening your aperture helps bring in more light while also separating your subject from the background. This can be useful in low light, but it also reduces how much of the scene is in focus, so it needs to be used with intention.
ISO becomes more important in these conditions. Increasing it allows you to maintain your shutter speed and aperture when light is limited. While higher ISO introduces noise, it’s usually better to accept some grain than to lose the shot entirely due to blur.
If you’ve already looked at travel photography settings, you’ll recognise this trade-off between sharpness and noise. The same principle applies here — protecting the shot is more important than keeping the image perfectly clean.
Low light photography feels difficult at first, but once you understand these trade-offs, it becomes much more manageable. Instead of guessing, you’re simply adjusting your settings based on what the scene allows.
When to Change ISO
Knowing when to adjust ISO is one of the simplest ways to gain confidence with beginner photography settings, because it helps you maintain control when light conditions change.
A good way to think about ISO is that it supports the decisions you’ve already made with shutter speed and aperture. Instead of changing everything at once, you set those first based on the scene, and then use ISO to balance the exposure.
You should increase ISO when:
- Your image is too dark
- You need a faster shutter speed to avoid blur
- You want to keep your chosen aperture
For example, if you’re photographing people and need a shutter speed of 1/250 to keep them sharp, but there isn’t enough light, raising ISO allows you to maintain that shutter speed instead of lowering it and risking blur.
The same applies if you’ve chosen an aperture to control depth of field. Rather than changing that decision, ISO gives you a way to support it.
One of the most common mistakes beginners make is trying to keep ISO as low as possible at all times. While this can produce cleaner images, it often leads to slower shutter speeds and less usable photos.
It’s more important to protect the image you’re trying to take.
If you’ve worked through camera settings explained, you’ll recognise how ISO fits into the overall balance of your settings. It’s not the first thing you adjust, but it’s often the one that allows everything else to work.
As a simple rule, increase ISO when you need to protect sharpness or maintain your creative choice. Don’t raise it without reason, but don’t avoid it when the situation requires it.
When to Change Aperture
Knowing when to change aperture is less about technical precision and more about deciding what matters in your photo. Within beginner photography settings, this is one of the most important shifts to make — moving from adjusting settings to making intentional choices.
Aperture controls how much of your scene is in focus. Changing it allows you to either isolate a subject or include more of the environment.
You should open your aperture (use a lower f-number like f/1.8 to f/2.8) when:
- You want to focus attention on a single subject
- The background is distracting
- You’re shooting in lower light and need more brightness
This creates a softer background and helps your subject stand out more clearly.
You should close your aperture (use a higher f-number like f/5.6 to f/8 or higher) when:
- You want more of the scene in focus
- The environment is important to the image
- You’re shooting landscapes or wider scenes
This keeps more detail visible across the frame and gives the viewer a clearer sense of the setting.
The key is not to treat aperture as a setting you adjust randomly, but as a decision about emphasis. If everything in the image is equally sharp, the viewer doesn’t know where to look. If only a small part is in focus, the subject becomes much clearer.
If you’ve already explored travel photography settings, you’ll recognise how aperture plays a role in shaping the story of the scene, not just the technical outcome.
As a simple approach, decide what you want the viewer to notice first, and set your aperture to support that. Once that becomes your focus, your settings start to feel more intentional and easier to manage.
Putting It All Together
Getting comfortable with beginner photography settings isn’t about memorising perfect numbers or trying to control every detail. It’s about having a simple process you can rely on when you’re actually taking photos.
A practical way to approach this is to think in steps.
Start by deciding what matters in the scene. Is there movement you need to freeze, or a subject you want to isolate? That decision helps you choose your shutter speed and aperture.
Next, adjust ISO to support those choices. If the image is too dark, increase ISO rather than compromising the settings that define how the photo looks.
This approach keeps things consistent. Instead of guessing or changing everything at once, you’re making clear, simple decisions based on what the scene requires.
The more you use this process, the more natural it becomes. You spend less time thinking about settings and more time focusing on what’s in front of you.
If you want to move beyond settings and develop a clearer understanding of what actually makes a photo work, The Confident Photographer explores how to recognise what matters in a scene and make better decisions before you take the shot.
For a practical reference you can use while shooting, the Photography Cheat Sheet Bundle includes simple, printable guides designed to help you stay consistent in real situations.
Frequently Asked Questions
What are the best beginner photography settings to start with?
The best beginner photography settings are a shutter speed of around 1/250, an aperture between f/5.6 and f/8, and ISO 100–200 in daylight. This combination provides a balanced starting point for sharp, clear photos in most situations.
What camera settings should beginners use in daylight?
Beginners should use a fast enough shutter speed to avoid blur (around 1/250), a mid-range aperture like f/5.6 to f/8, and a low ISO. These settings are simple, reliable, and work well in most outdoor conditions.
What are the best beginner photography settings for low light?
In low light, use a wider aperture (f/2.8 to f/4), a shutter speed around 1/125 or faster, and increase ISO as needed. This helps maintain sharpness while allowing enough light into the camera.
Why are my photos blurry as a beginner?
Photos are usually blurry because the shutter speed is too slow. Increasing your shutter speed or raising ISO to support it can help keep your images sharp, especially when photographing movement.
Should beginners use Auto ISO?
Yes, Auto ISO can be helpful for beginners because it allows the camera to adjust brightness automatically while you focus on shutter speed and aperture. This makes it easier to adapt to changing light conditions.
What is the easiest way to learn camera settings?
The easiest way to learn beginner photography settings is to focus on a small number of controls and use them consistently. Start with shutter speed, aperture, and ISO, and practice adjusting them in real situations.
How do I know when to change my camera settings?
You should change your settings when the image is too dark, too bright, blurry, or not focusing on the right subject. Adjust one setting at a time so you can understand how each change affects the result.