Best Camera Settings for Travel Photography
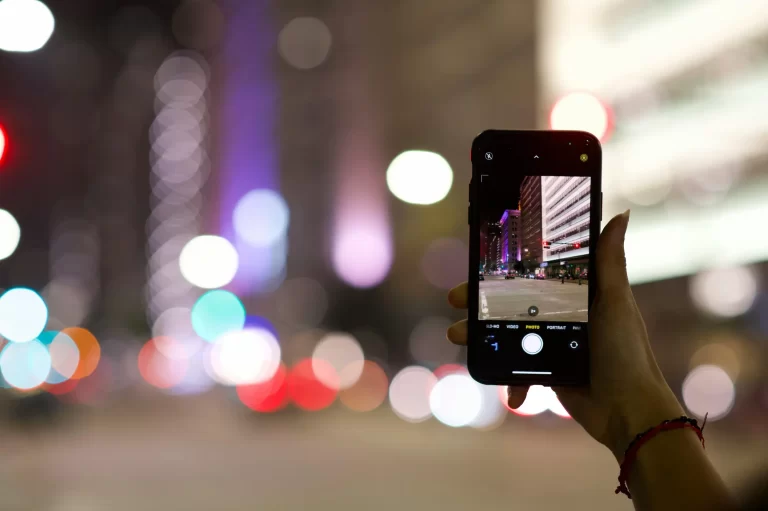
Most travel photos don’t fail because of bad locations — they fail because the settings weren’t ready when the moment happened.
You see something interesting, lift your camera, take the shot… and later realise it’s blurry, too dark, or just doesn’t feel the way it looked in real life.
That’s the frustration most people run into with travel photography.
It’s not that they don’t understand their camera. It’s that they don’t have a simple way to choose the right settings when things are moving quickly.
Once you fix that, everything starts to feel easier — and your photos start to reflect what you actually saw.
Getting your travel photography settings right is one of the fastest ways to improve your photos when you’re on the move. Travel doesn’t give you controlled conditions. Light changes quickly, people move unpredictably, and moments disappear before you get a second chance.
That’s why relying on automatic modes often leads to inconsistent results. The camera doesn’t understand what matters in the scene — it simply reacts to light. If you want more control over your photos, you need to understand how to adjust your settings with intention.
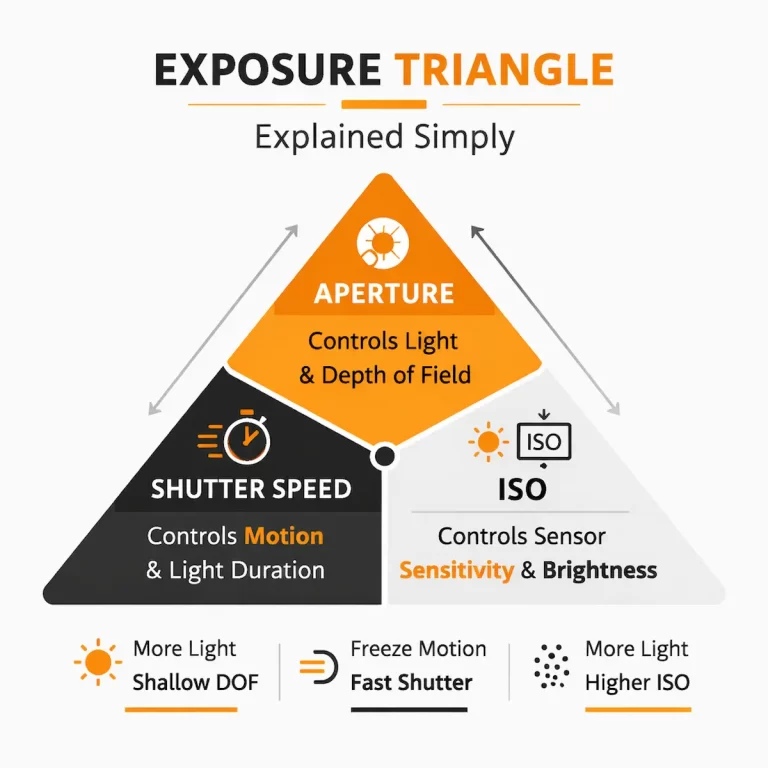
If you’re new to this, it helps to first understand how exposure works. This is where the exposure triangle explained becomes important, as it forms the foundation of all camera decisions. From there, building confidence with camera settings explained will make it much easier to adapt when conditions change.
This guide breaks down travel photography settings into simple, practical choices you can use immediately — whether you’re walking through a busy market, shooting landscapes, or capturing everyday moments on the road.
Travel photography looks simple from the outside, but it’s one of the most difficult environments to get consistent results. You’re constantly dealing with variables you can’t control — changing light, moving subjects, unfamiliar locations, and limited time to react.
Unlike studio or planned photography, travel rarely gives you a second chance. A moment happens once, and then it’s gone. People walk through your frame, light shifts behind clouds, or the scene changes before you’ve had time to think. This is where many photographers struggle, because they rely on settings that are too slow to adapt.
Another challenge is that travel photography often combines multiple styles at once. In a single day, you might shoot street scenes, landscapes, portraits, and low-light environments. Each of these situations requires slightly different travel photography settings, and switching between them quickly is what separates consistent results from missed opportunities.
This is why understanding your camera matters more than memorising perfect settings. Most photography education platforms, including Nikon Learn & Explore, emphasise that photographers improve by learning how to adjust to changing conditions rather than relying on fixed presets.
The goal isn’t to have one perfect setup. The goal is to have a simple, flexible approach you can adjust without overthinking.
If you want something practical to help with that, a quick reference can make a big difference when you’re under pressure.
Download the Travel Photography Cheat Sheet to keep your settings simple and accessible while you’re shooting.
Why Travel Photography Is Difficult
Travel photography looks simple from the outside, but it’s one of the most difficult environments to get consistent results. You’re constantly dealing with variables you can’t control — changing light, moving subjects, unfamiliar locations, and limited time to react.
Unlike studio or planned photography, travel rarely gives you a second chance. A moment happens once, and then it’s gone. People walk through your frame, light shifts behind clouds, or the scene changes before you’ve had time to think. This is where many photographers struggle, because they rely on settings that are too slow to adapt.
Another challenge is that travel photography often combines multiple styles at once. In a single day, you might shoot street scenes, landscapes, portraits, and low-light environments. Each of these situations requires slightly different travel photography settings, and switching between them quickly is what separates consistent results from missed opportunities.
This is why understanding your camera matters more than memorising perfect settings. Most photography education platforms, including Nikon Learn & Explore, emphasise that photographers improve by learning how to adjust to changing conditions rather than relying on fixed presets.
The goal isn’t to have one perfect setup. The goal is to have a simple, flexible approach you can adjust without overthinking.
If you want something practical to help with that, a quick reference can make a big difference when you’re under pressure.
Download the Travel Photography Cheat Sheet to keep your settings simple and accessible while you’re shooting.
Shutter Speed for Travel Photography
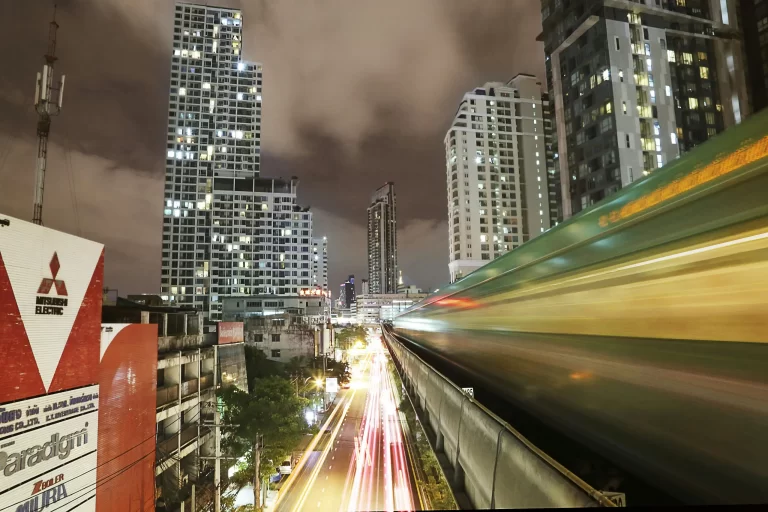
Shutter speed is one of the most important parts of your travel photography settings, because it directly controls how motion appears in your photos. When you’re travelling, movement is constant — people walking, traffic passing, markets changing by the second — and your ability to handle that movement determines whether your image works or not.
If your shutter speed is too slow, your photos will be blurry. If it’s fast enough, you’ll freeze the moment cleanly. This is why shutter speed is often the first setting you should think about when shooting in dynamic environments.
For most travel situations, a good starting point is:
- 1/250 → general walking scenes, casual movement
- 1/500 → busy streets, faster movement, candid moments
- 1/1000 → fast action, vehicles, unpredictable motion
These aren’t fixed rules, but they give you a reliable baseline. If you’re unsure, it’s usually better to go slightly faster and adjust from there.
At the same time, not every travel photo needs to freeze motion. In some situations, a slightly slower shutter speed can add a sense of movement and atmosphere. For example, using 1/60 or 1/125 can introduce subtle motion blur in crowds, which can make the scene feel more alive rather than static.
The key is deciding what matters in the frame. If your subject is a person you want to keep sharp, your shutter speed needs to support that decision. If the scene itself is about movement, then allowing some blur becomes part of the image rather than a mistake.
This is where many beginners struggle. They focus on settings in isolation instead of thinking about the outcome they want. If you’re still building confidence, it can help to revisit the fundamentals of how settings interact in the camera settings explained guide, especially when balancing shutter speed with aperture and ISO.
As a simple approach, prioritise shutter speed first when shooting travel scenes with movement. Once that’s set, you can adjust your other settings to support it.
In most real-world situations, a sharp photo with slightly higher ISO is far more usable than a blurry photo caused by a shutter speed that was too slow.
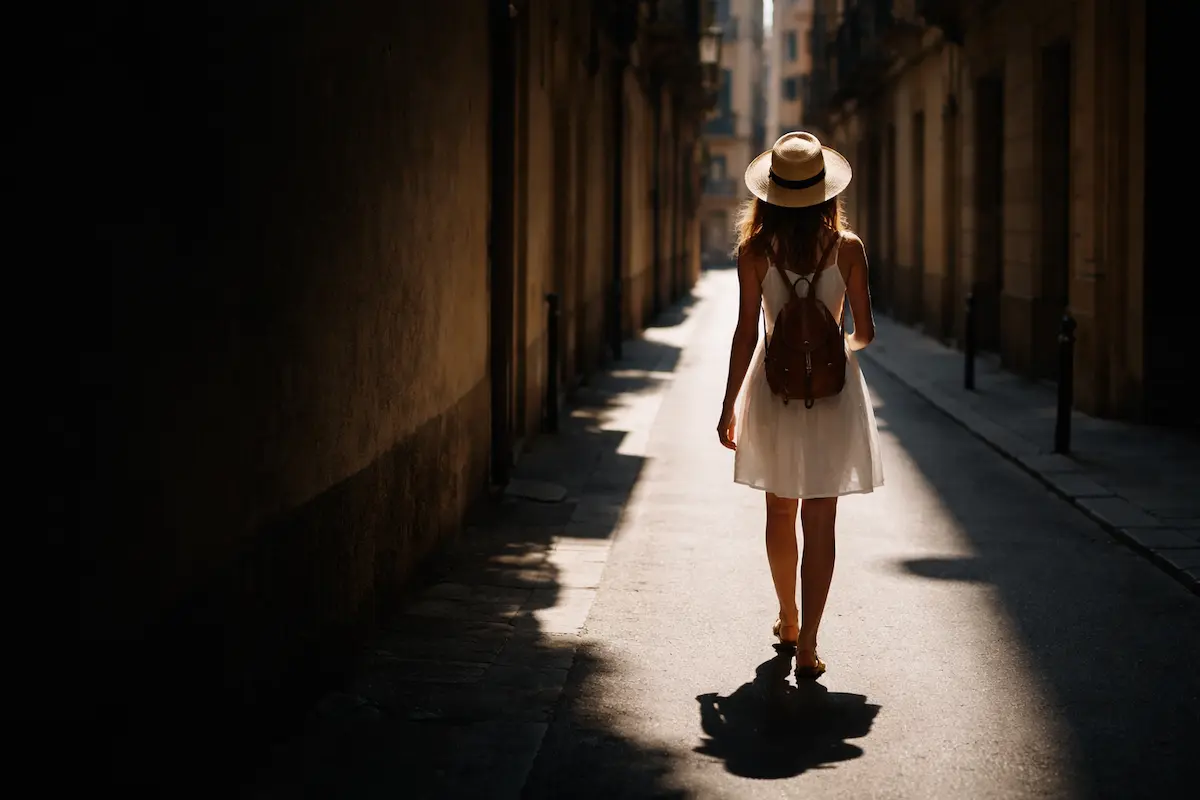
Aperture Choices for Travel Photos
Aperture controls how much of your scene is in focus, and in travel photography, that decision shapes how your photo feels. While shutter speed handles motion, aperture determines whether your subject stands out clearly or blends into the environment.
When choosing travel photography settings, aperture is less about technical precision and more about deciding what matters in the frame.
If you want to isolate a subject — for example, a person in a market or a detail in a street scene — a wider aperture like f/1.8 to f/2.8 will create background blur and help draw attention to that subject. This works well when the background is distracting or when you want a cleaner, more focused image.
For more general travel scenes, a middle range such as f/5.6 to f/8 is often the most practical choice. This gives you enough depth to keep your subject sharp while still showing some of the surrounding environment. It’s a reliable option when you’re moving quickly and don’t have time to fine-tune every shot.
When shooting landscapes or wider scenes, a narrower aperture like f/8 or higher helps keep more of the image in focus from front to back. This is useful when the scene itself is the subject, rather than a single point of interest.
The mistake many beginners make is treating aperture as a setting they need to “get right,” rather than a decision about emphasis. If everything in the frame is equally sharp, the image can feel flat. If too little is in focus, the scene can lose context.
Understanding this balance is part of developing confidence with beginner photography settings, where the goal isn’t perfection, but clarity in your choices.
As a simple approach, use aperture to support your subject. Decide what you want the viewer to notice first, and set your aperture to make that clear.
ISO Settings for Travel
ISO controls how sensitive your camera is to light, and in travel photography, it’s the setting that allows you to adapt quickly when conditions change. Unlike shutter speed and aperture, which shape how the image looks, ISO is often the setting that helps you maintain those choices when light isn’t ideal.
When working with travel photography settings, ISO should be treated as a support tool rather than something to avoid. Many beginners hesitate to increase ISO because they’re worried about noise, but in real-world situations, keeping your image sharp matters far more than keeping it perfectly clean.
As a general guide:
- ISO 100–200 → bright daylight, clean images
- ISO 400–800 → overcast conditions, shaded areas
- ISO 800–1600+ → low light, indoor scenes, evening
These ranges aren’t strict limits, but they give you a practical starting point. Modern cameras handle higher ISO much better than they used to, and a slightly noisy image is almost always more usable than one that is blurred due to a shutter speed that was too slow.
This becomes especially important when you’ve already chosen a shutter speed to freeze movement or an aperture to control depth. If there isn’t enough light to support those settings, ISO is what allows you to keep your decisions intact rather than compromise them.
A simple way to think about ISO is this: raise it only when you need to protect the shot you’re trying to take. Don’t increase it by default, but don’t avoid it when the situation requires it.
As with all travel photography settings, the goal isn’t perfection — it’s getting a usable image in a moment that won’t repeat.
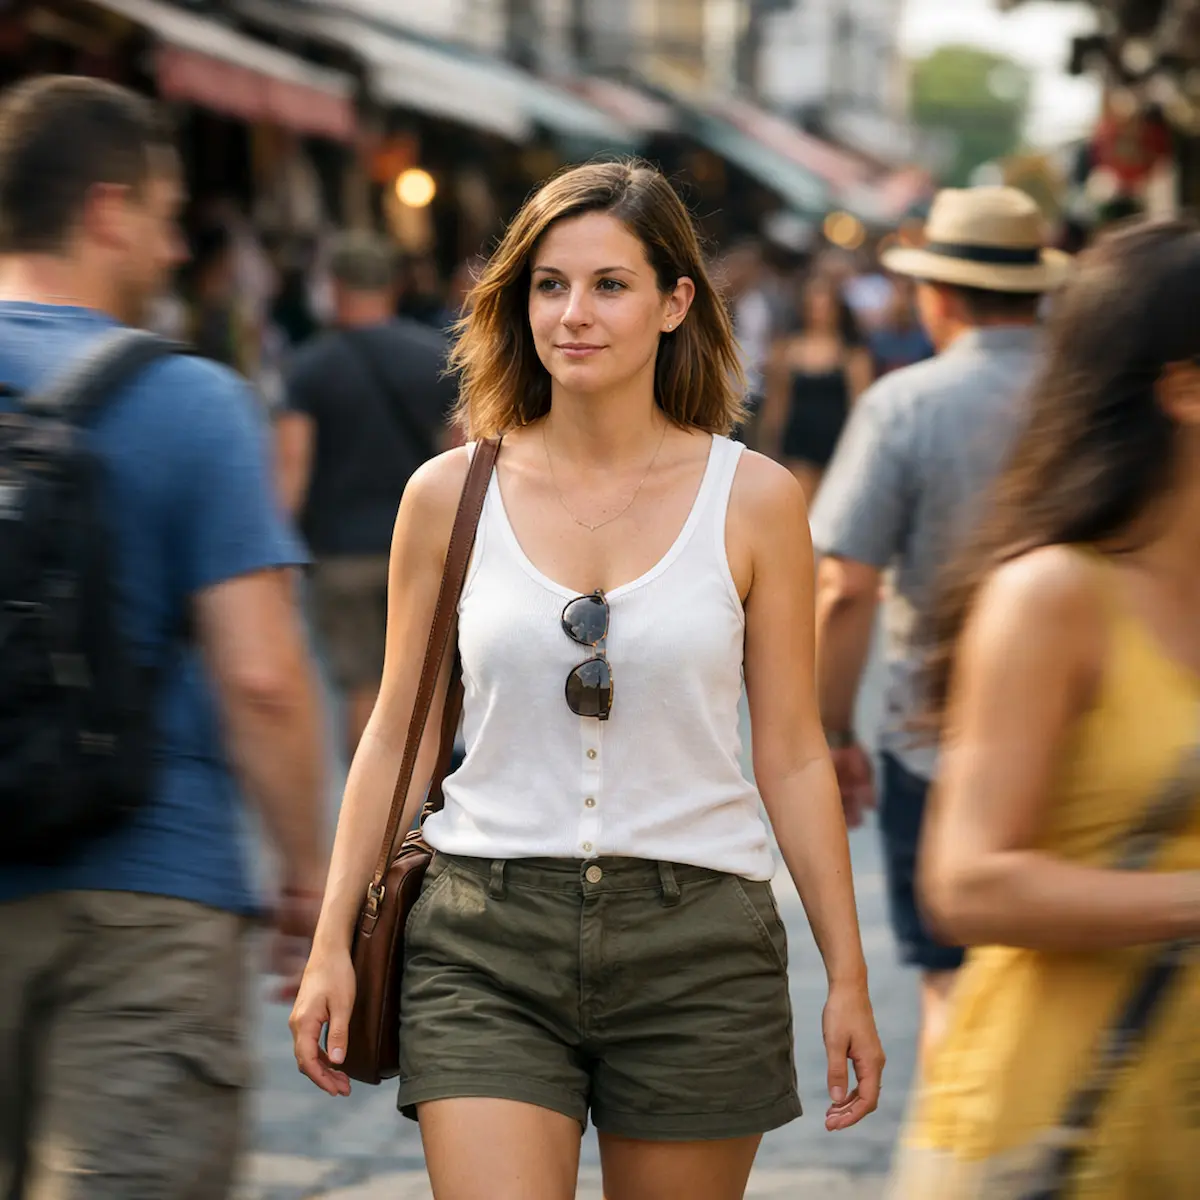
Street Photography Settings
Street photography is one of the most demanding situations for your travel photography settings, because everything happens quickly and unpredictably. People move in and out of your frame, moments appear without warning, and there’s rarely time to adjust your camera before the shot is gone.
Because of this, your settings need to be simple, reliable, and ready before anything happens.
A practical starting point for most street situations is:
- Shutter Speed: 1/250 or faster
- Aperture: f/5.6 to f/8
- ISO: Auto ISO (with a reasonable upper limit)
This combination gives you a good balance between sharpness, depth, and flexibility. A shutter speed of at least 1/250 helps freeze everyday movement, while an aperture around f/5.6 or f/8 gives enough depth to keep your subject in focus without needing perfect precision.
Using Auto ISO can be especially helpful in street environments. Light changes constantly as you move between open streets, shade, and indoor spaces. Allowing your camera to adjust ISO automatically lets you maintain your chosen shutter speed and aperture without slowing down.
The goal here isn’t to fine-tune every shot. The goal is to remove hesitation so you can react quickly.
Another factor to consider is focus. In fast-moving environments, relying on precise autofocus for every shot can slow you down. Some photographers use simpler approaches, such as pre-focusing or using a wider depth of field, to increase their chances of capturing the moment without delay. You don’t need to overcomplicate this — the key is making sure your subject is sharp when it matters.
If you want to go deeper into this approach, the full street photography settings guide breaks this down in more detail.
Ultimately, strong street photography comes from being ready. When your settings are already working in the background, you’re free to focus on timing, positioning, and what’s actually happening in front of you.
Landscape Travel Settings
Landscape photography while travelling requires a different approach to your travel photography settings. Unlike street photography, where speed and reaction matter most, landscape scenes give you more time to slow down and make deliberate choices.
In most cases, the goal with landscapes is to capture detail across the entire scene. This means using an aperture that provides enough depth of field to keep both the foreground and background sharp.
A practical starting point is:
- Aperture: f/8 to f/11
- Shutter Speed: adjusted based on light
- ISO: as low as possible (typically ISO 100–200)
An aperture around f/8 to f/11 gives you a good balance between sharpness and depth without introducing unwanted softness from extremely narrow settings. From there, your shutter speed becomes more flexible, since landscapes usually don’t involve fast movement.
If your camera is handheld, you’ll still need to keep your shutter speed high enough to avoid camera shake. A general guide is to stay above 1/100, but this depends on your lens and how steady you are. If you’re using a tripod, you have more freedom to use slower shutter speeds without introducing blur.
ISO should generally be kept as low as possible to maintain image quality. Since landscapes don’t require fast shutter speeds in most cases, there’s usually no need to increase ISO unless you’re shooting in low light.
Light plays a major role in landscape photography. Early morning and late afternoon often produce softer, more directional light, which adds depth and contrast to the scene. Midday light can be harsh and flat, making it harder to create a strong image even with correct settings.
As with all travel photography settings, the goal is not to memorise exact numbers, but to understand what the scene needs. With landscapes, that usually means prioritising depth, stability, and timing over speed.
Putting It All Together
Getting consistent results with your travel photography settings isn’t about memorising perfect numbers. It’s about understanding how to adjust quickly based on what’s happening in front of you.
Shutter speed helps you control movement. Aperture shapes what the viewer focuses on. ISO supports both when light isn’t ideal. When you start thinking about these settings as simple decisions rather than technical rules, photography becomes much easier to manage in real situations.
Travel will always be unpredictable. Light changes, people move, and scenes don’t wait. The goal is not to get everything perfect, but to give yourself the best chance of capturing the moment clearly and intentionally.
A simple approach works best. Start with a shutter speed that suits the scene, choose an aperture based on what matters, and adjust ISO to support those choices. This keeps your process consistent, even when your environment isn’t.
If you want to move beyond settings and develop a clearer understanding of what makes a photo work, The Confident Photographer explores how to recognise what matters in a frame and make better decisions before you press the shutter.
For a practical, everyday reference, the Photography Cheat Sheet Bundle includes printable guides for travel, street, exposure, and camera settings — designed to help you stay consistent while you’re out shooting.
Frequently Asked Questions
What are the best travel photography settings for beginners?
The best travel photography settings for beginners are a shutter speed of at least 1/250, an aperture between f/5.6 and f/8, and Auto ISO. This combination provides a balance between sharpness, depth, and flexibility, making it easier to adapt to changing conditions while travelling.
What shutter speed should I use for travel photography?
A shutter speed of 1/250 is a reliable starting point for most travel photography. If your subject is moving quickly, increase it to 1/500 or higher. Faster shutter speeds help ensure your images remain sharp, especially in busy environments.
What aperture is best for travel photos?
The best aperture depends on the scene. Use f/1.8 to f/2.8 to isolate a subject, f/5.6 to f/8 for general travel photography, and f/8 to f/11 for landscapes where you want more of the scene in focus.
Should I use Auto ISO for travel photography?
Yes, Auto ISO can be very useful in travel photography because light conditions change quickly. It allows you to maintain your chosen shutter speed and aperture while the camera adjusts ISO automatically to keep the exposure balanced.
Why are my travel photos blurry?
Travel photos are often blurry because the shutter speed is too slow. Increasing your shutter speed to at least 1/250 can help reduce motion blur and improve sharpness, especially when photographing people or movement.
What camera settings should I use for street photography while travelling?
For street photography, use a shutter speed of 1/250 or faster, an aperture around f/5.6 to f/8, and Auto ISO. These settings allow you to react quickly and capture moments without needing to constantly adjust your camera.
How do I choose the right settings for travel photography?
Choosing the right travel photography settings comes down to understanding the scene. Set your shutter speed based on movement, choose an aperture based on what you want in focus, and adjust ISO to support those decisions. This approach helps you stay consistent in changing conditions.