
Exposure Triangle — For Travel Photography
$4.90
A practical, travel-first guide to the exposure triangle (shutter speed, aperture, ISO). Learn what to change first in real scenes — street, temples, beaches, and night — so you stop guessing and start getting consistent results. Includes printable PDF + phone-friendly version. Instant download.
Description
Exposure Triangle — For Travel Photography is a compact decision system that turns the “triangle” into something you can actually use on the road. Instead of theory, it gives you simple starting points and fast fixes for common travel situations — bright sun, mixed indoor light, neon streets, moving subjects, and crowded scenes where you don’t have time to overthink.
What you’ll get (digital download):
-
Printable PDF (A4) for a quick-reference binder or travel folder
-
Phone-friendly version for fast checks while shooting
-
Clear “change this first” guidance for shutter speed, aperture, and ISO
-
Travel-specific examples: street/markets, temples, beaches, night & neon, landscapes
-
Simple troubleshooting so you can recover shots without spiralling into settings
Who it’s for:
-
Beginners who understand the words “ISO” and “aperture” but still feel unsure in real scenes
-
Intermediate shooters who want faster decisions and fewer missed moments
-
Anyone who travels with both camera and phone and wants consistent results
The 650+ word SEO section (human, natural)
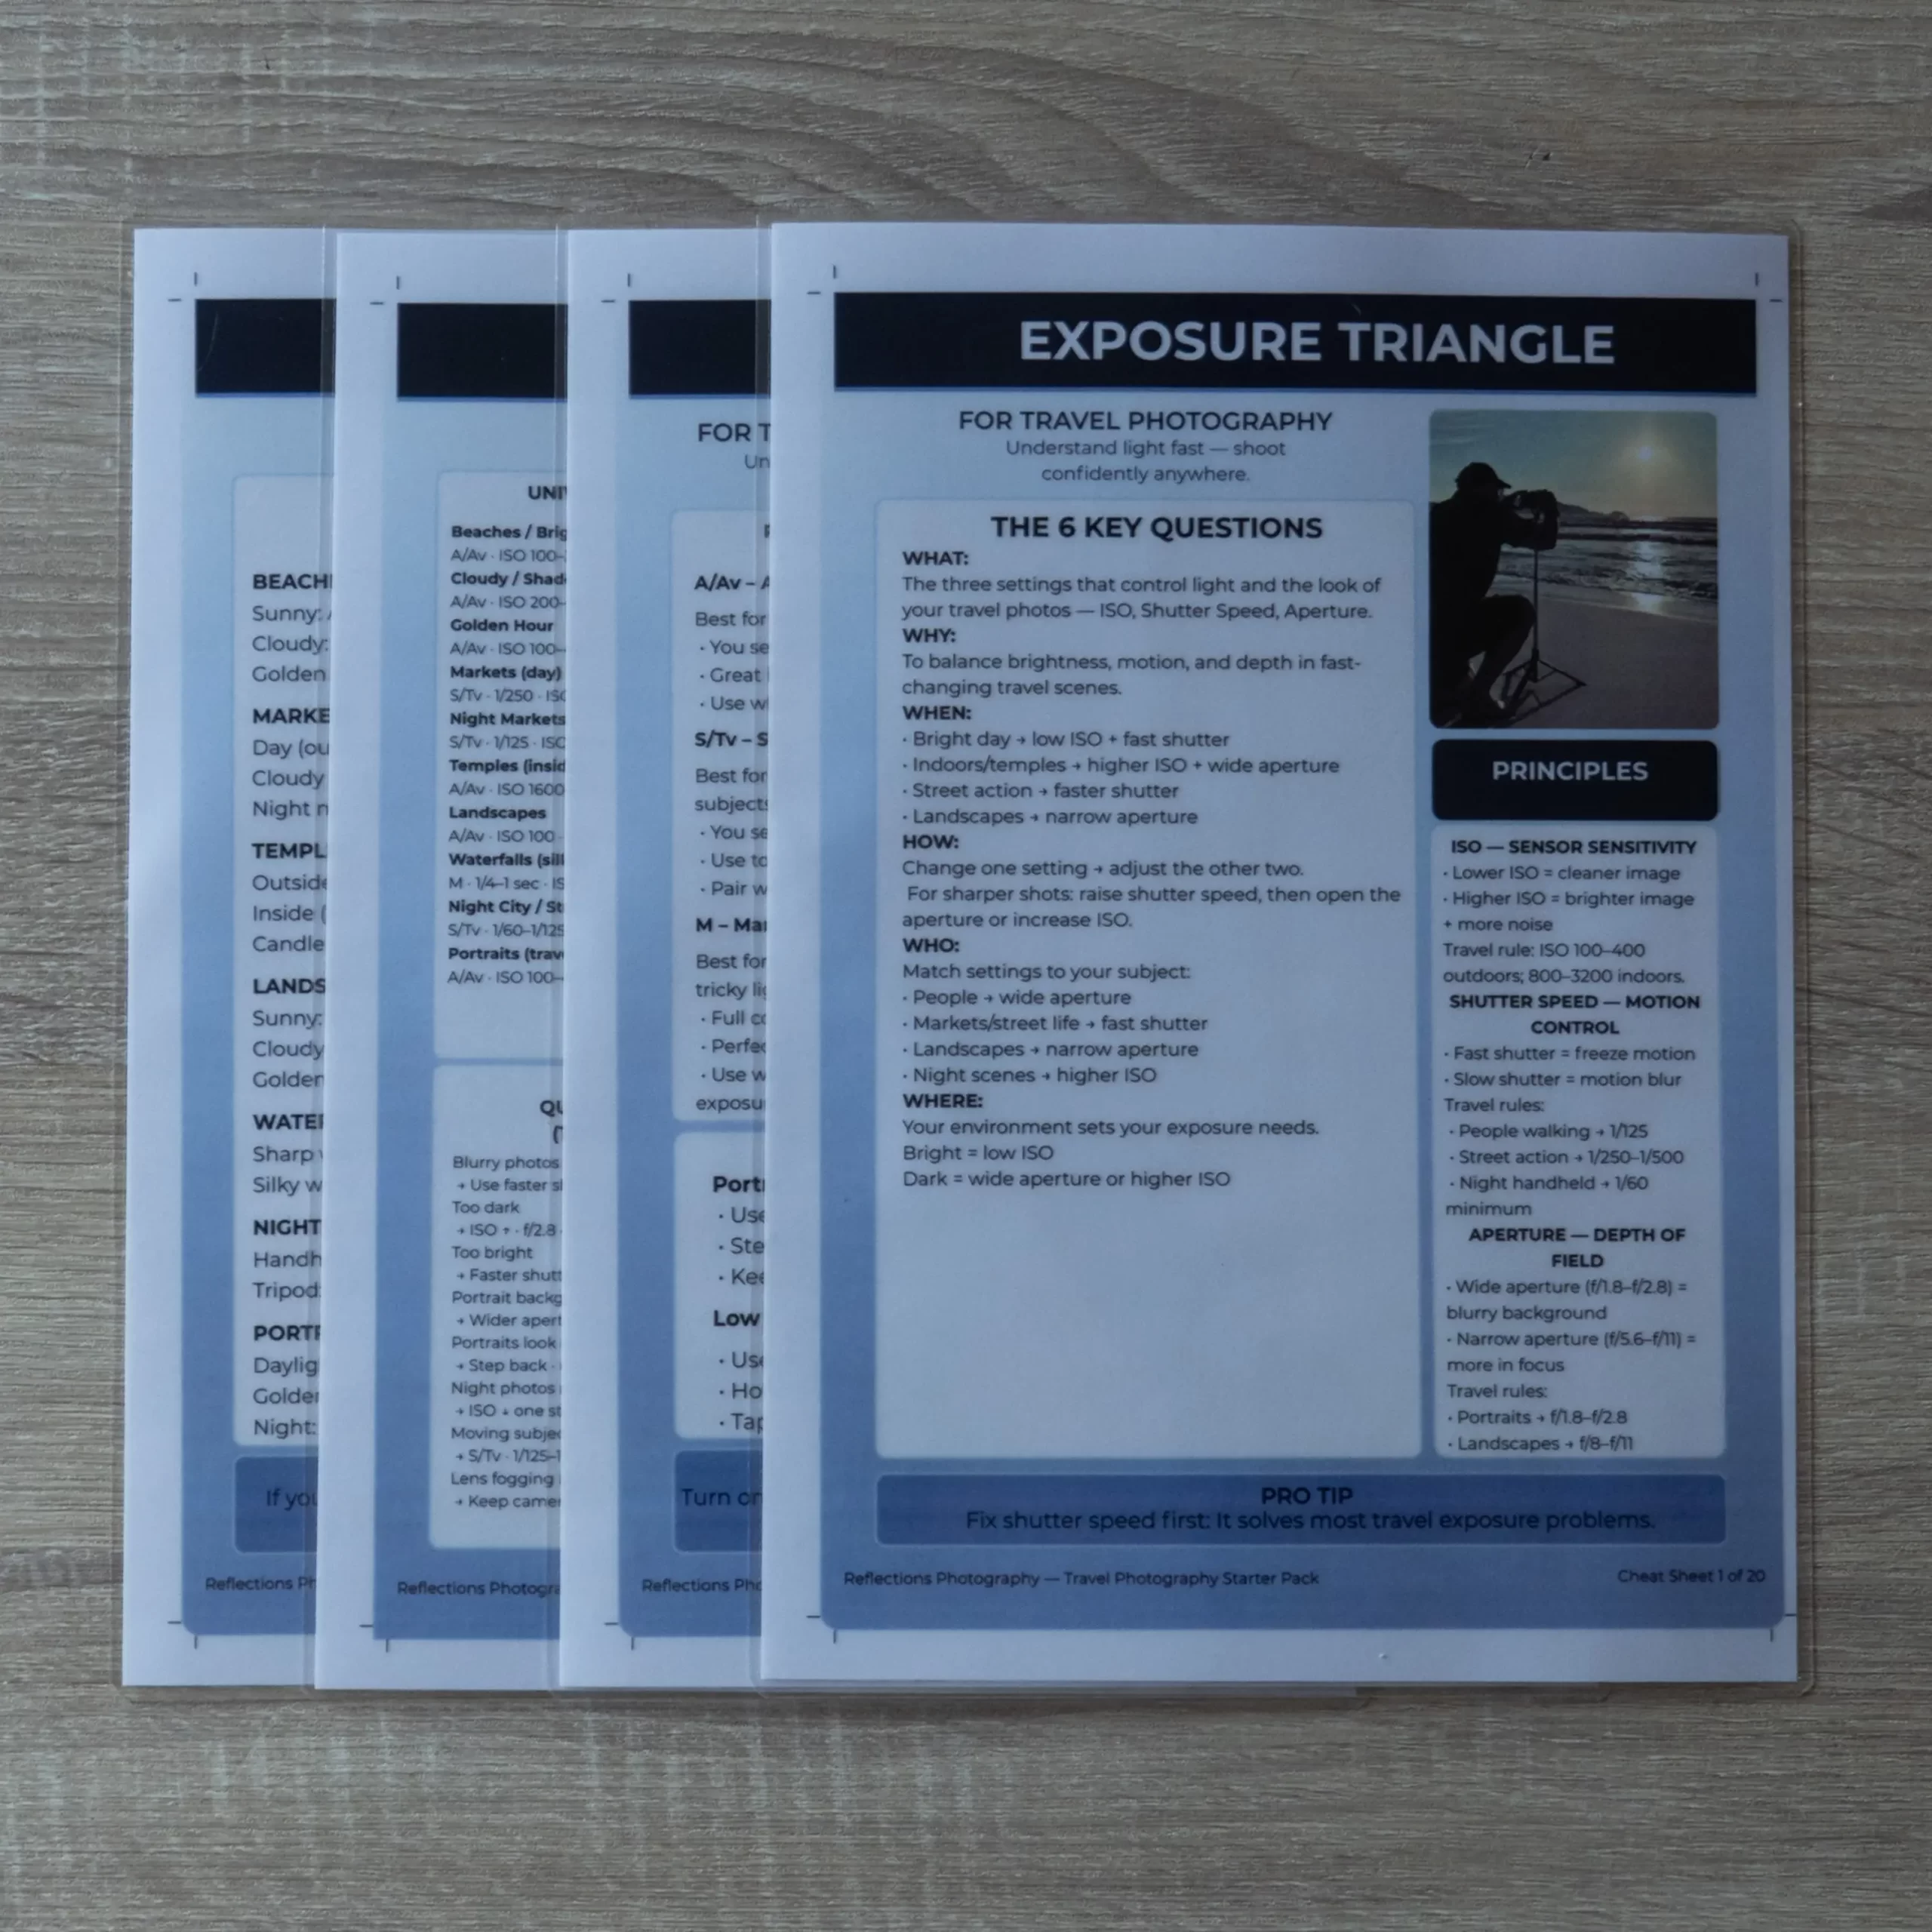
The exposure triangle is one of those photography concepts everyone hears about early — shutter speed, aperture, and ISO — but it often stays stuck in “classroom mode.” Travel photography is the exact environment where that breaks down. You’re walking into changing light every few minutes, you’re shooting handheld, people are moving, and the best moments don’t wait while you scroll menus.
This cheat sheet is designed to make the exposure triangle practical. It gives you a simple way to decide what matters most in the moment, so you can set a baseline quickly and then make one smart change at a time. The goal isn’t to turn you into a technician. The goal is to help you get the photo, consistently, across the messy reality of travel.
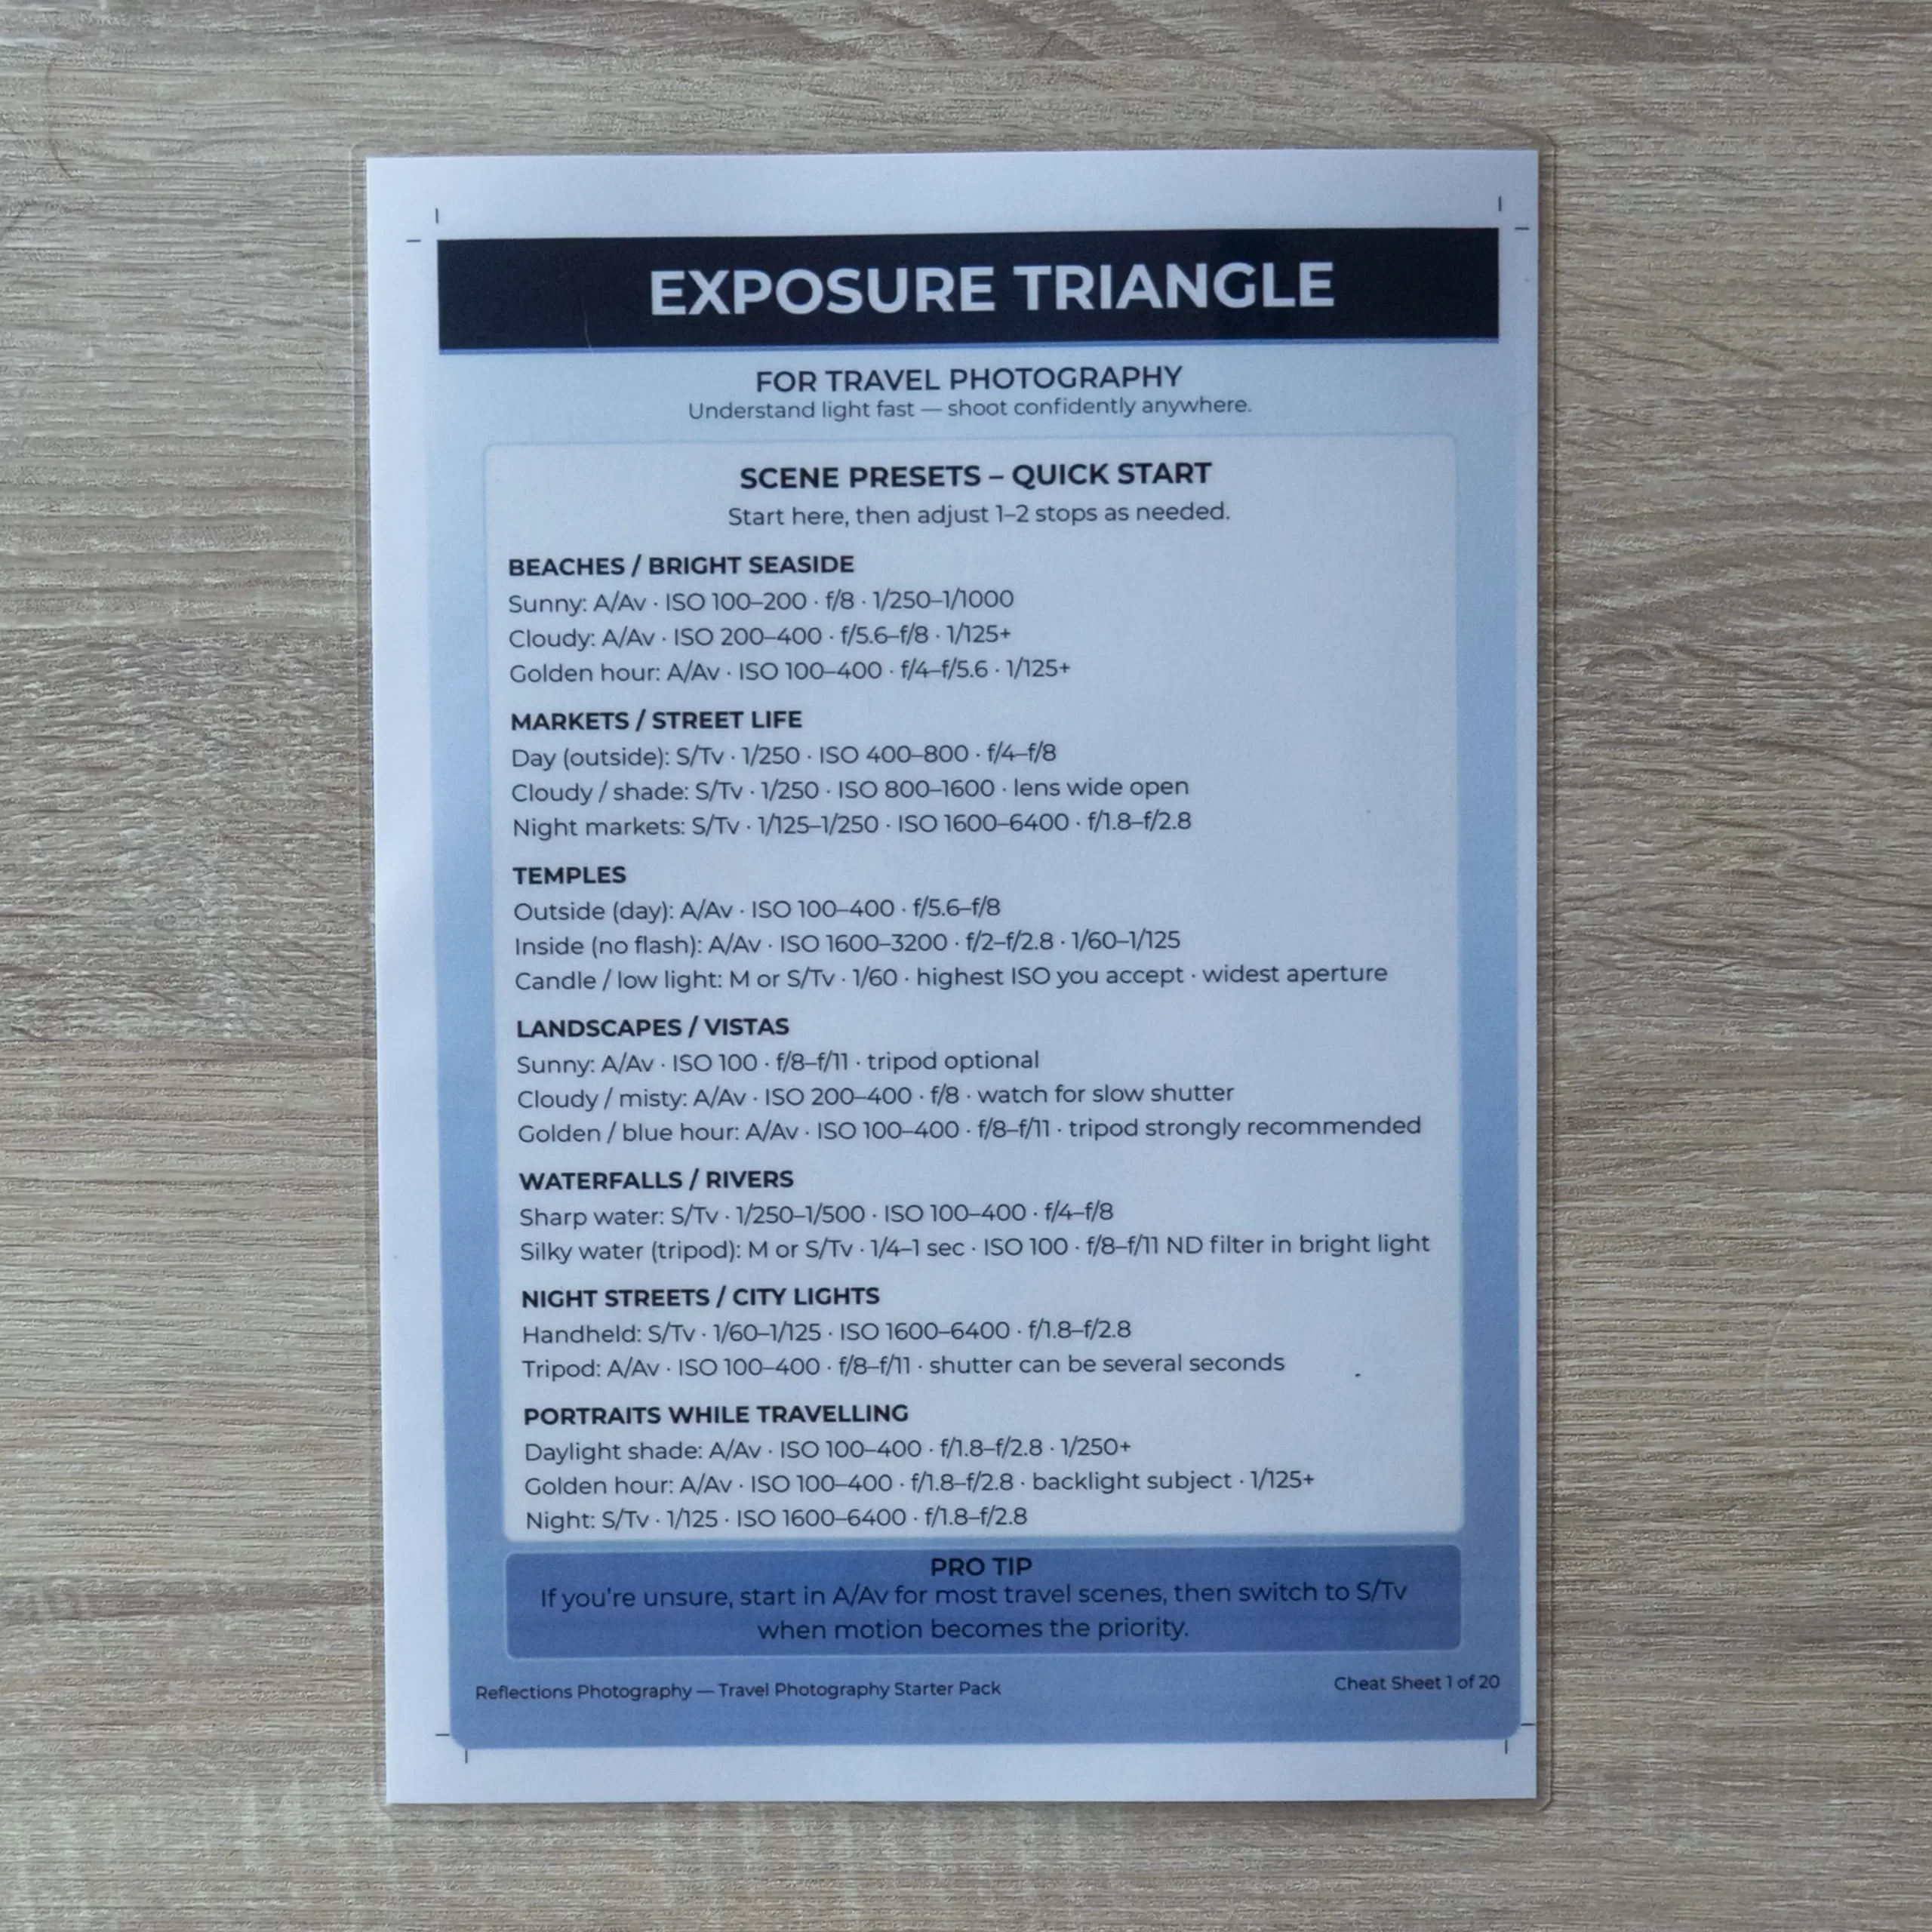
A big reason exposure feels confusing is because the “triangle” sounds like you should balance everything equally. In real travel environments, you usually have a priority, and that priority changes depending on the scene. If your subject is moving — a street vendor, traffic, kids playing, dancers, a busy market — shutter speed becomes the first decision because motion blur can ruin the shot. If you’re in a temple, café, or indoor location where light is low and tripods aren’t practical, you need a simple plan for keeping images sharp without blowing out highlights or pushing noise too far. If you’re shooting a landscape while travelling, you might care more about depth and clarity, and the triangle needs to support that without slowing you down.
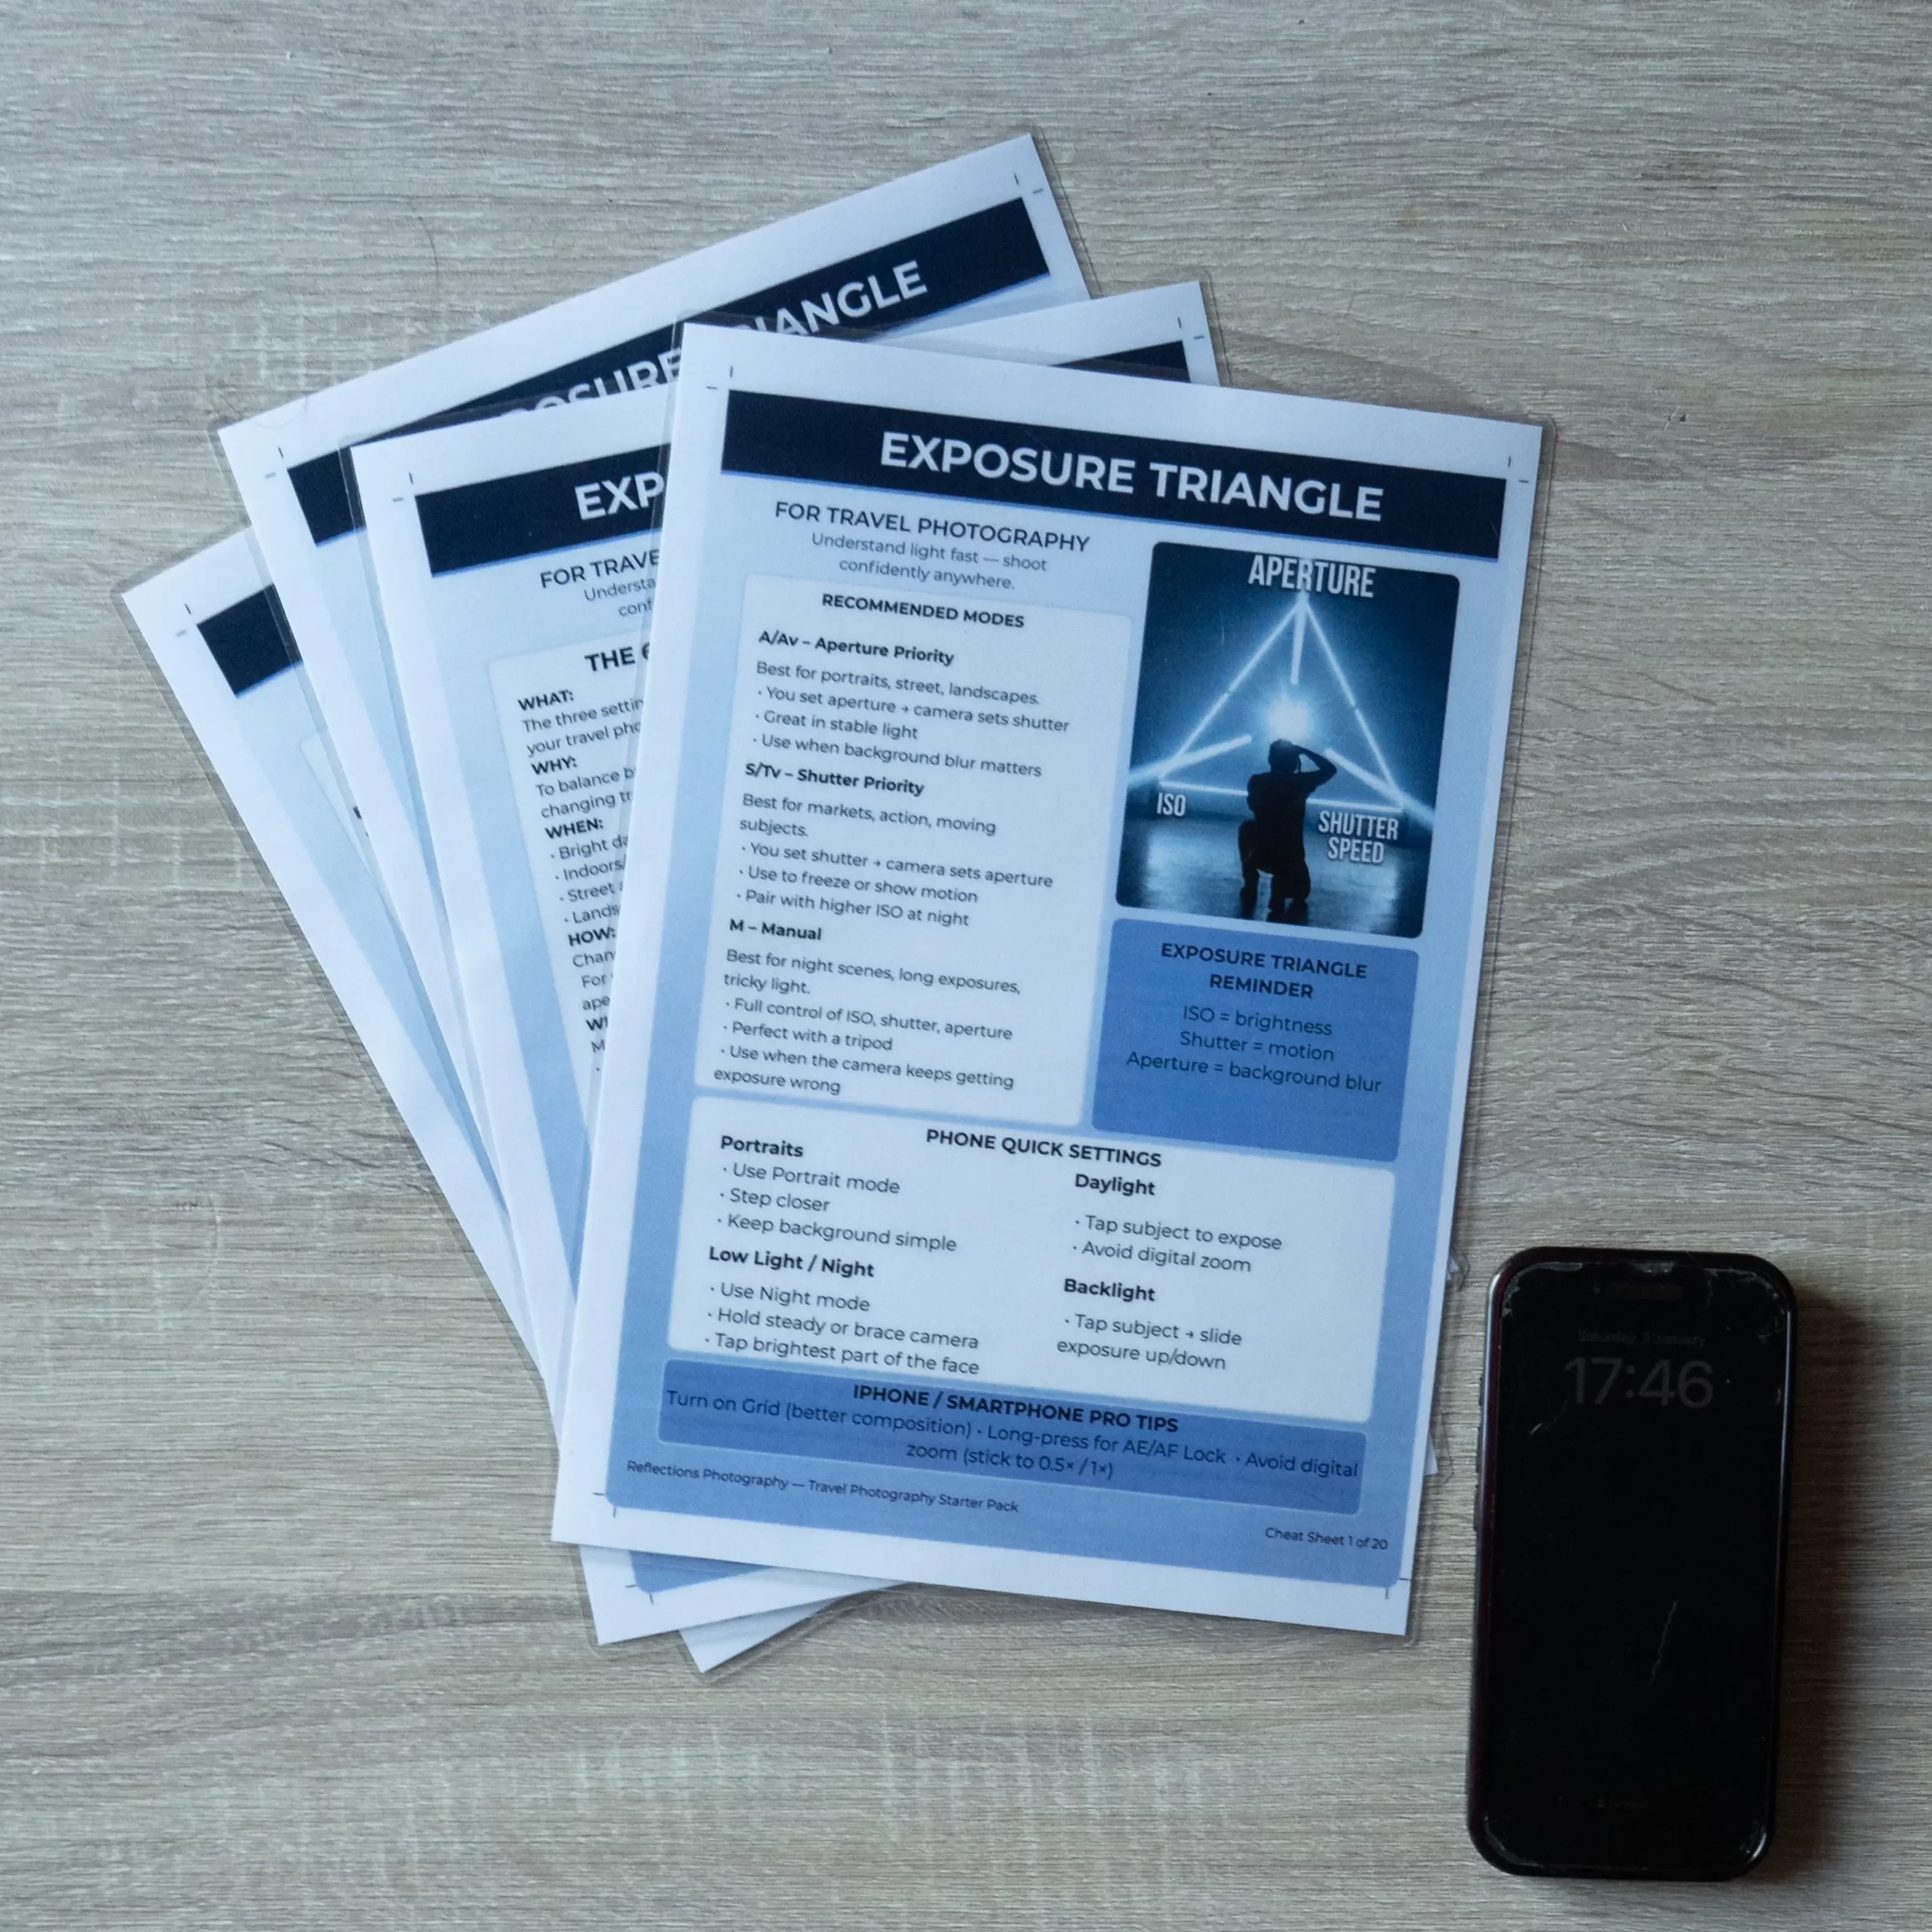
This product walks you through those priorities with travel-specific starting points. It helps you choose a safe shutter speed for handheld shooting, understand when aperture actually matters (and when it doesn’t), and use ISO as a tool instead of a fear. It also shows you how to read the scene quickly: What is the light doing? What is moving? What can you control? What can’t you control? That way, the exposure triangle becomes a decision path, not a math problem.
Because travel photographers often bounce between phone and camera, the guidance is written in a way that still makes sense even if you’re shooting on a modern smartphone. Phones hide some settings, but the same exposure trade-offs are happening in the background. Understanding the exposure triangle helps you make better choices with any device — for example, when to stabilise yourself, when to add light, when to avoid digital zoom, and when to accept a higher ISO because the moment matters more than perfection.
You’ll also get quick troubleshooting rules that help you recover shots fast. If your image is blurred, this cheat sheet shows you the most likely cause and the simplest fix. If the scene is too dark, it helps you decide whether to raise ISO, open aperture, or slow shutter speed — and what you’ll trade away with each choice. If highlights are blowing out (common in beaches and bright sun), it shows you which adjustment gives you control without killing the vibe of the scene.
Most importantly, this cheat sheet is built for use in the field. It’s not meant to be read once and forgotten. It’s meant to sit on your phone or be printed and used like a quick reference so you can build confidence through repetition. Over time, you’ll notice you’re reaching correct exposure faster, missing fewer moments, and spending less time “fixing” everything later.
If you’ve ever felt like you understand photography in theory but freeze in real travel situations, Exposure Triangle — For Travel Photography is the missing bridge. It simplifies the choices, keeps the language clear, and gives you a reliable method you can apply anywhere — street, sea, city, or temple — without overthinking.
Reviews
There are no reviews yet.