ISO Demystified: Clean Images in Any Light
Estimated read time: 18–20 minutes
There’s a moment every photographer meets sooner or later: you’re indoors, the light is moody, your subject is alive with expression—and your photos keep coming out blurry or dark. You open the aperture. You slow the shutter. Still not there. That’s when ISO steps in. ISO is your permission to brighten the world without changing the depth of field or the slice of time you’re capturing. Used well, it gives you sharp, clean images in places you thought were impossible. Used carelessly, it turns detail into sand.
This friendly, real-world guide will show you exactly what ISO (photography) is, how it affects noise and color, when to raise it, when not to, and how to pair it with shutter speed and aperture so you can shoot with confidence—on a camera or a smartphone. We’ll keep the language human, the examples practical (hello Phuket cafés, Old Town streets, and beach sunsets), and the steps easy to follow.
ISO in Plain Language (What It Is and What It Does)
ISO controls how strongly your camera amplifies the light it has already collected. Think of it as a clean volume knob. Turn it up (higher ISO) and the picture looks brighter without changing your aperture or shutter speed. Turn it down (lower ISO) and you get the cleanest, richest files your camera can make.
- Low ISO (100–200): Clean color, smooth tones, maximum dynamic range.
- Mid ISO (400–1600): Still very usable on modern cameras; great for indoors and dusk.
- High ISO (3200–12800+): Bright in the dark; introduces more noise and can compress dynamic range.
Film throwback: With film, ISO (ASA) was the sensitivity baked into the roll. In digital, ISO is electronic amplification after the sensor collects the signal. Different path, same idea: higher ISO = brighter image at the cost of more noise.
Why ISO Matters (Beyond “Noise”)
ISO isn’t just about grain—it’s about getting the shot and preserving what matters in that shot.
- Freeze moments you can’t repeat. A child’s laugh, a dancer’s jump, a scooter whooshing by at dusk—ISO lets you keep a fast shutter without going dark.
- Keep the depth of field you want. Love that f/2.8 blur? ISO lets you stay at f/2.8 instead of stopping down just to get brightness.
- Protect color and highlights. Lower ISO usually gives better color fidelity and headroom for bright areas. When you must raise ISO, you’ll trade a bit of that—but you’ll keep the moment sharp.
In short: raise ISO for sharpness and timing; lower ISO for maximum quality—and balance the triangle to taste.
Where ISO Lives in the Exposure Triangle (Quick Refresher)
The exposure triangle has three corners:
- Aperture (f-stop): Light through the lens + depth of field.
- Shutter speed: How long light hits the sensor + motion blur/freeze.
- ISO: How much you amplify the captured signal + noise/dynamic range.
When you open your aperture or slow your shutter, you can lower ISO for cleaner files. When you need a faster shutter or a particular aperture, you often raise ISO to keep exposure on target.
A No-Stress ISO Workflow (Works Anywhere)
Use this five-step loop to keep your photos sharp and clean.
- Pick your priority: Freeze motion? (Shutter speed priority.) Shape depth? (Aperture priority.)
- Set a sensible starting point:
- Daylight outdoors: ISO 100–200
- Shade/indoors: ISO 400–1600
- Night/action: ISO 1600–6400+
- Enable Auto ISO with smart limits (details below).
- Add a minimum shutter (in Auto ISO) to protect sharpness.
- Check highlights & faces, then nudge:
- Too dark or blurry? Raise ISO (or allow Auto ISO to).
- Blown highlights? Lower ISO or use –EC and brighten shadows later.
Auto ISO: The Secret Weapon You’re Probably Underusing
Auto ISO lets the camera vary ISO to maintain exposure while you lock in aperture and/or shutter. Set it once and you’ll nail more real-world photos with less fiddling.
Smart Auto ISO Setup
- Base ISO: 100 (or your camera’s base).
- Max ISO cap (pick per camera quality + your tolerance):
- Crop-sensor/older bodies: cap 3200–6400
- Modern full-frame: cap 6400–12800
- Minimum shutter speed:
- Portraits: 1/125–1/250s
- Street/walking: 1/250s
- Kids/pets: 1/500–1/1000s
- Sports: 1/1000–1/2000s
- Panning: 1/30–1/60s (intentionally slow)
Now choose your mode:
- Aperture Priority (A/Av): You pick depth; camera picks shutter + ISO within your limits.
- Shutter Priority (S/Tv): You pick time; camera picks aperture + ISO.
- Manual (M) + Auto ISO: You pick both shutter and aperture, and Auto ISO floats to match exposure. Use Exposure Comp (yes, it works in many M+Auto ISO combos) to bias bright/dark.
Pro tip: In M + Auto ISO, the exposure meter still matters. Dial +/- EC to protect highlights (–0.3 to –1.0 at night cityscapes) or brighten faces (+0.3 to +1.0 against backlight).
Real-World ISO Starting Points (You’ll Actually Use)
| Scene / Goal | Aperture | Shutter | ISO (start) | Why / Notes |
|---|---|---|---|---|
| Beach daylight portrait | f/2.8 | 1/250s | 100–200 | Clean color; add +EC for backlight |
| Street in shade | f/4–5.6 | 1/250s | 400–800 | Keeps motion crisp without excess noise |
| Indoor café portrait | f/2–2.8 | 1/125–1/250s | 800–3200 | Accept some ISO to keep eyes sharp |
| Kids/pets running | f/2.8–4 | 1/1000s | 1600–3200 | Freeze action; Auto ISO handles swings |
| Night market (handheld) | f/1.8–2.8 | 1/125–1/250s | 1600–6400 | Protect skin tones; noise beats blur |
| Blue hour cityscape (tripod) | f/8 | 5–15 s | 100 | Long shutter gives clean files |
| Waterfall in shade (tripod) | f/8–11 | 0.5–2 s | 100 | ISO 100 = best color & DR |
| Astro (wide lens) | f/2–2.8 | 10–20 s | 1600–3200 | Balance star brightness vs. trails |
| Concert/backstage | f/1.8–2.8 | 1/250–1/500s | 3200–12800 | Motion + low light; embrace grain |
| Panning scooter | f/8 | 1/30–1/60s | 100–200 | Intentional motion blur; low ISO for cleaner streaks |
Use these as starting points; then adjust for your camera and taste.
Noise, Dynamic Range, and Color (The Trade You’re Making)
When you raise ISO, you’re amplifying signal and noise together. Three side effects matter:
- Noise increases:
- Luminance noise looks like fine grain; often acceptable.
- Chroma noise looks like colored speckles; remove it first in editing.
- Dynamic range shrinks:
Higher ISO can reduce how much highlight detail you can hold. Protect important highlights (skin speculars, neon signs) with exposure compensation or manual control. - Color can flatten:
Very high ISO can mute subtle color transitions. Shoot RAW to recover more color and tone later.
Key mindset: A sharp, noisy moment beats a soft, clean miss. Get the timing; clean it up in post.
ETTR, ETTL, and “Expose for What You Care About”
You might hear advice like ETTR (“Expose To The Right”) to reduce noise by exposing a bit brighter (without clipping highlights). It can work for static scenes, landscapes, and studio work.
- ETTR is helpful when you can control motion and use a tripod. Slightly brighter exposure → lower ISO or more data in shadows → cleaner edit.
- ETTR is risky for highlights you care about (wedding dress, bright foam, neon). Overdo it and you clip detail.
- For people and action, think EFC—Expose For the Content. Protect faces and important highlights first; accept lifting shadows later.
Five Clean Ways to Reduce Noise (Before Editing)
- Use the lowest ISO that still gives you the shutter and aperture you need.
- Stabilize (tripod/railing/bean bag) so you can use a longer shutter at low ISO.
- Add light (window side, LED panel, off-camera bounce) to keep ISO down.
- Avoid underexposure. Lifting dark frames in post makes noise explode.
- Watch your background. Smooth tones show noise more than textured areas; compose smartly.
Denoising in Post (Without Turning People to Plastic)
Shoot RAW if possible. Then:
- Start with color (chroma) noise reduction. Remove color speckles first.
- Add luminance NR sparingly. Push until grain looks fine, not smeared.
- Mask your sharpening. Sharpen eyes, hair, edges—not skin and sky.
- Work local: Use subject/sky masks to apply NR where it’s needed.
- Order of operations: Denoise → basic exposure/white balance → color → local adjustments → then final sharpening.
- AI denoise tools can be excellent—still, check micro-detail and halos at 100%.
Pro tip: A touch of film grain after denoise can hide banding and give a natural texture, especially on portraits.
Creative Uses for High ISO (Grit Is a Look)
Sometimes noise isn’t a problem—it’s part of the mood.
- Gritty monochrome street: ISO 6400 at night gives tooth and atmosphere.
- Backstage/concerts: High ISO lets you freeze emotion under harsh spots.
- Documentary interiors: Embrace the texture; protect story and expression.
When using noise intentionally, keep faces sharp and highlights under control so it reads as a choice, not a mistake.
Light You Can Add (Fast, Cheap, Friendly)
ISO gets easier when you add or shape light.
- Window light: Turn subjects toward the brightest window; step back from colored walls.
- Bounce flash: Point a flash at a light ceiling/wall for soft, natural fill at ISO 400–800.
- Small LED panel: A pocket LED at 10–20% power close to the subject saves 2–3 stops of ISO.
- Reflector: A white card or reflector opposite the window lifts shadows without changing the vibe.
Smartphones and ISO (Computational Superpowers)
Phones have tiny sensors, so ISO rises fast in dim light. But modern phones fight noise with multi-frame stacking (Night mode), HDR, and clever denoising. You can help them:
- Stabilize—brace on a railing; Night mode takes multiple frames and merges them at lower ISO.
- Use the main (wide) camera, not the tiny tele in low light. The main sensor is larger and cleaner.
- Avoid digital zoom; step closer or crop later.
- Tap to focus/expose, then drag the exposure slider down a touch to protect highlights; the stack will lift shadows cleanly.
- Try Pro/Manual (if available): set ISO 100–400 at dusk and let the phone use longer shutter times; brace the phone.
Smartphone recipes
- Night market portrait: Main camera, Portrait mode if edges are clean. Brace, ISO auto, tap face, lower exposure slightly, shoot 2–3 frames.
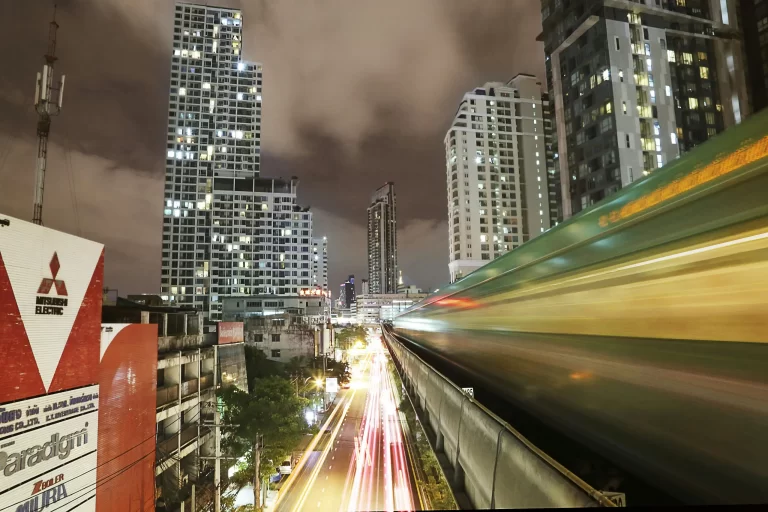
- Light trails: Night mode or a long-exposure app; brace; 2–4 seconds; keep ISO low.
- Indoor café: Sit by a window. Tap face, slide exposure up/down until skin looks right. Avoid mixed lighting if you can.
Four Case Studies (Settings + Thought Process)
1) Indoor Café Portrait (Natural Light)
- Goal: Sharp eyes, natural skin, soft background.
- Settings (APS-C): f/2.0 • 1/200s • ISO 1600, Eye AF, window light camera-left.
- Why: 1/200s freezes small movements; ISO 1600 keeps exposure without flattening color.
- Edit: Color NR 25, Luma NR 10; subject mask for a gentle exposure lift; background clarity –10.
2) Night Market Street (Handheld)
- Goal: Clean color with some motion in passersby.
- Settings (FF): f/2.8 • 1/250s • Auto ISO capped at 6400.
- Why: 1/250s catches gestures; Auto ISO floats with changing stalls.
- Edit: Slight noise reduction; warm WB; local contrast on signs; recover highlights with –0.3 EV if needed.
3) Blue Hour Cityscape (Tripod)
- Goal: Rich color, no noise, crisp lines.
- Settings: f/8 • 10 s • ISO 100, stabilization off, 2-sec timer.
- Why: Long shutter at base ISO = maximum dynamic range and cleanest shadows.
- Edit: Subtle Dehaze, perspective correction; zero NR needed.
4) Dusk Action at the Beach (Volley or Surf)
- Goal: Freeze peak motion; keep color believable.
- Settings (FF): f/2.8 • 1/1000s • Auto ISO capped 12800.
- Why: Shutter must be fast; accept higher ISO to get the moment.
- Edit: Luma NR 20–30; color NR 25; selective sharpening on subject; tiny grain to even tones.
Troubleshooting (Fast Fixes)
“So much noise!”
- You underexposed. Next time, nudge exposure up (without clipping) or add light. Use a slower shutter on a brace/tripod to lower ISO.
“Images are sharp but flat and gray.”
- High ISO can compress dynamic range. Add contrast and black point; dodge/burn locally to restore depth.
“Skin looks waxy after denoise.”
- You went too far. Back off luminance NR, sharpen eyes/hair only, and add a hint of grain.
“Banding under LEDs.”
- That’s shutter interacting with flicker, not ISO. Try 1/50, 1/100 (50 Hz regions) or enable anti-flicker.
“Colors shift in the dark.”
- Mixed light sources. Set custom white balance or fix WB in RAW with a skin-tone reference.
45-Minute Practice Plan (Camera or Phone)
Set A (15 min): ISO vs. shutter trade
- In a dim room, lock f/2.8. Shoot 1/60, 1/125, 1/250, 1/500s with Auto ISO.
- Compare sharpness vs. noise; pick your preferred balance.
Set B (15 min): Clean night color
- On a tripod/railing, shoot the same scene at ISO 100 with long shutter, then ISO 3200 with short shutter.
- Compare noise, color richness, and highlight roll-off.
Set C (15 min): People in motion
- Photograph walking subjects at dusk: 1/250s Auto ISO cap 6400.
- Then try 1/1000s and accept the ISO jump. Which moments feel stronger?
Take notes. In two sessions, your ISO instincts will sharpen—no more guessing.
Myths to Drop Today
- “High ISO is always bad.” Missing the moment is worse. Modern sensors handle ISO 3200–6400 surprisingly well.
- “Noise ruins prints.” Moderate noise nearly disappears on paper and social sizes.
- “ETTR is a magic fix.” It helps sometimes—but not when it clips highlights or forces a slow shutter that blurs the subject.
- “Auto ISO is for beginners.” Pros use it daily with caps and minimum shutter—especially for fast-changing light.
Quick-Reference Table (Bookmark This)
| Goal | Mode | Shutter | Aperture | ISO Strategy | Pro Tip |
|---|---|---|---|---|---|
| Portrait, window light | A/Av | 1/125–1/250 | f/2–2.8 | Auto ISO cap 3200 | Prioritize sharp eyes |
| Street, shade | A/Av | ~1/250 | f/4–5.6 | Auto ISO 800 | Bump to 1600 in deep shade |
| Kids/pets | S/Tv | 1/1000 | f/2.8–4 | Auto ISO 3200 | Freeze first, denoise later |
| Night market | M + Auto ISO | 1/250 | f/2–2.8 | Cap 6400 | Protect skin highlights |
| Blue hour city (tripod) | M | 5–15 s | f/8 | ISO 100 | Turn IBIS/OSS off |
| Astro (wide) | M | 10–20 s | f/2–2.8 | ISO 1600–3200 | Mind star trails |
| Concert | S/Tv | 1/250–1/500 | f/2–2.8 | ISO 6400–12800 | Time shots between light pulses |
| Panning | S/Tv | 1/30–1/60 | f/8 | ISO 100–200 | Follow smoothly; many frames |
make it happen
Ready to get clean images in any light?
- Try the 45-minute practice plan tonight—handheld at the night market, then a blue-hour tripod shot for comparison.
- Download our Night Photography Cheat Sheet to keep ISO, shutter, and aperture dialed without guesswork.
- Want a friendly, structured path? Join Capture with Confidence—step-by-step lessons, real assignments, and feedback.
- Prefer learning in the field? Come out on a Photography Adventure Tour in Phuket—Freedom Beach sunrise, Old Town light trails, and golden-hour temple portraits. Camera or smartphone welcome.
ISO isn’t a penalty. It’s a permission slip—to keep your story sharp, your colors believable, and your moments intact when the light gets thin. Use it with intent, and your photos will look less like compromises—and more like you.
more resources
- Shutter Speed Made Simple
- Aperture Made Easy (Depth of Field Without the Jargon)
- Exposure Triangle for Beginners
- Night Photography Cheat Sheet (Downloadable) →
/shop/night-photography-cheat-sheet - Capture with Confidence (Beginner Course)
- Photography Adventure Tours (Phuket)
Optional external references:
Cambridge in Colour (Noise & ISO primer)