Exposure Triangle for Beginners: Master Light with Aperture, Shutter Speed, and ISO
Estimated read time: ~15–18 minutes
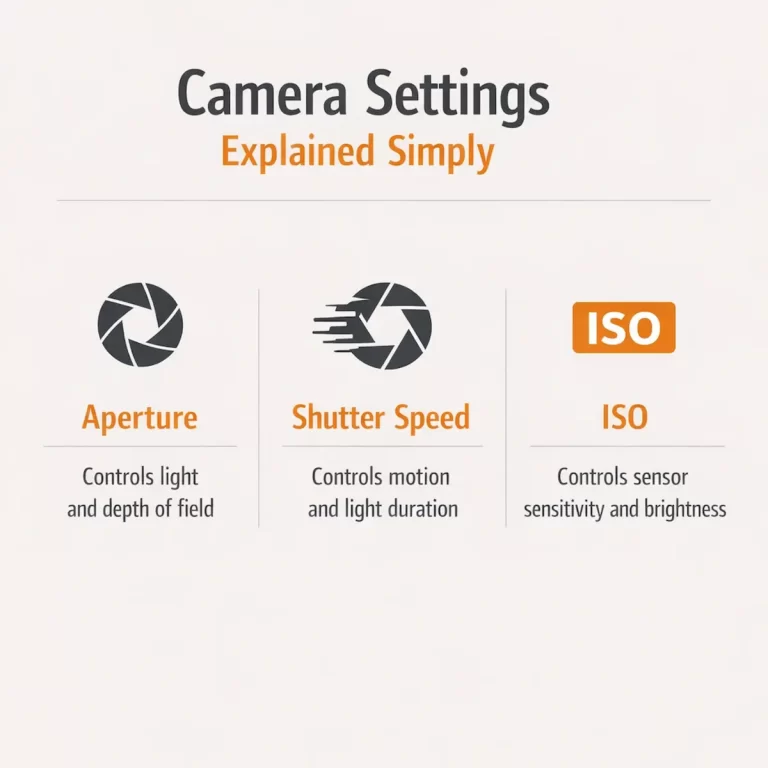
You don’t need to memorize every knob on your camera to take better photos. What you do need is a feel for three simple dials that shape every picture: aperture, shutter speed, and ISO. Together, they’re known as the exposure triangle—three levers that decide how bright your image is and how it looks: motion, background blur, grain, and color.
This is a friendly, real-world guide to the exposure triangle. We’ll keep the tone practical, with Phuket-style examples (beaches, city nights, waterfalls) and quick recipes you can actually try. By the end, you’ll know how to pick settings without guesswork—on a camera or a smartphone—and how to trade one setting for another to get the look you want.
What is the Exposure Triangle (in plain language)?
The exposure triangle is the relationship between:
- Aperture (f-number): how wide the lens opens.
Side effects: depth of field (background blur), lens sharpness, and risk of diffraction at tiny apertures. - Shutter speed (seconds): how long the sensor sees light.
Side effects: freezes or blurs motion; affects camera shake. - ISO (sensitivity): how strongly the sensor amplifies light.
Side effects: noise, grain, and dynamic range.
Change any one corner and you change the overall exposure. To keep brightness the same, you usually compensate with one of the other corners.
Think of it like a three-way see-saw: push down on one side, and the others must shift to balance the picture.
Why the exposure triangle matters (beyond the tech)
Because it’s how you make creative choices on purpose:
- Do you want to stop motion or show it? That’s shutter speed.
- Do you want creamy background blur or crisp front-to-back detail? That’s aperture.
- Do you want a clean file or are you okay with some grain to get the shot? That’s ISO.
Once you see photos as the result of a trade, you stop fighting your camera and start directing it.
The quick, no-stress workflow
Use this five-step loop in any scene.
- Decide the story.
Freeze or blur? Shallow or deep focus? Clean or gritty—what matters most? - Pick your priority mode.
- A/Av (Aperture Priority): you set aperture; camera sets shutter. Great for portraits/landscapes.
- S/Tv (Shutter Priority): you set time; camera sets aperture. Great for sports/panning.
- M (Manual): you set both; perfect for consistent lighting (studio, night cityscapes).
- Set a sensible baseline.
- Portraits: f/2.8–f/4, 1/125s, Auto ISO.
- Landscapes: f/8–f/11, base ISO, shutter as needed on tripod.
- Action: 1/1000–1/2000s, open aperture, ISO as needed.
- Check the meter & histogram.
If you’re too bright/dark, adjust exposure compensation (in A/Av or S/Tv) or tweak all three in Manual. - Zoom in and refine.
Missed focus? Too blurry? Raise shutter. Background too sharp? Open the aperture. Noisy? Lower ISO and give shutter more time.
Corner 1: Aperture (f-numbers without the headache)
Aperture is written as f/1.8, f/2.8, f/5.6, f/11… Lower numbers mean a wider opening (more light) and a shallower depth of field (more background blur). Higher numbers mean a smaller opening (less light) and more of the scene in focus.
- Portrait look: f/1.8–f/2.8 (isolate the subject, creamy bokeh).
- Street / everyday: f/4–f/5.6 (balance subject and environment).
- Landscapes: f/8–f/11 (front-to-back sharpness).
- Macro: f/8–f/16 (depth of field is razor-thin up close).
Sharpness tip: Most lenses are crisp two stops down from wide open (e.g., a 1.8 lens is very sharp around f/4).
Diffraction tip: Past f/16 on many cameras, fine detail can soften—don’t chase tiny apertures unless you need them.
Corner 2: Shutter speed (how time shapes your photo)
Shutter speed is measured in seconds or fractions: 1/2000s (very fast) to 30s (very slow).
- Fast (1/1000s+): freeze action—surfers, birds, splashes.
- Medium (1/60–1/250s): everyday movement—walking, street.
- Slow (1/2–2s): blur waterfalls, smooth waves.
- Long (5–30s): night cityscapes, light trails, star points.
Hand-holding rule: start near 1 / focal length (e.g., 50 mm → ~1/80–1/125s on modern bodies). Image stabilization helps with your shake, not subject movement.
Want a deeper dive? See our companion post: Shutter Speed Made Simple (link in “Next Steps”).
Corner 3: ISO (clean vs. noisy)
ISO controls gain—how much the camera amplifies light. Higher ISO brightens the image without changing aperture or shutter, but adds noise and can reduce dynamic range.
- Base ISO (usually 100): cleanest files, best color.
- ISO 800–3200: great indoors or at night with fast shutter.
- ISO 6400+: use when you must; better a sharp, noisy moment than a blurry clean one.
Pro tip: If your shutter is already slow and your aperture can’t open more, don’t be afraid to raise ISO to get the shot. You can remove some noise later; you can’t rescue motion blur.
How the triangle trades work (simple, visual table)
| Goal / Scene | Aperture priority | Shutter priority | ISO strategy | Notes |
|---|---|---|---|---|
| Portrait (daylight) | f/2.8–f/4 | ≥1/125s | ISO 100–200 | Blur background, keep eyes sharp |
| Street walk | f/4–f/5.6 | ~1/250s | ISO 100–400 | Balance motion + context |
| Sports / surf | f/2.8–f/5.6 | 1/1000–1/2000s | ISO 400–1600 | Freeze action; burst mode |
| Waterfall / seascape | f/8–f/11 | 0.5–2s | ISO 100 | Tripod; ND filter in daylight |
| Night city—trails | f/8–f/11 | 10–20s | ISO 100 | Tripod; turn off stabilization |
| Indoor candid | f/2–f/2.8 | ≥1/125s | ISO 800–3200 | Accept some grain to keep moments sharp |
| Macro flower | f/8–f/16 | ≥1/125s (wind!) | ISO 100–400 | Focus stack if needed |
| Panning scooter | f/8 | 1/30–1/60s | ISO 100–200 | Follow smoothly; many frames |
Metering, histograms, and exposure compensation (the quick version)
Your camera’s meter tries to make scenes mid-tone. Bright beaches? It may underexpose. Night streets? It may overexpose neon.
- Histogram: a graph of brightness. Right edge clipping = blown highlights; left edge clipping = crushed shadows.
- Exposure Compensation (EC): nudge brightness +/- without leaving A/Av or S/Tv.
- Beach/snow: try +0.3 to +1.0.
- Backlit silhouettes: –0.7 to –1.3 for mood.
- Night city: usually –0.3 to –1.0 to protect lights.
Manual shooters: use the histogram and “blinkies” (highlight warning) to place exposure where you want it.
Lenses, stabilization, and filters (what actually helps)
- Stabilization (IBIS/OSS): lets you hand-hold 2–5 stops slower. Turn it off on a tripod to avoid micro-shake.
- ND filters: sunglasses for your lens; essential for long exposures in daylight (start with a 6-stop and 10-stop ND).
- Polarizer: cuts glare on water/foliage, deepens skies; costs ~1–2 stops of light (so it also helps you slow the shutter).
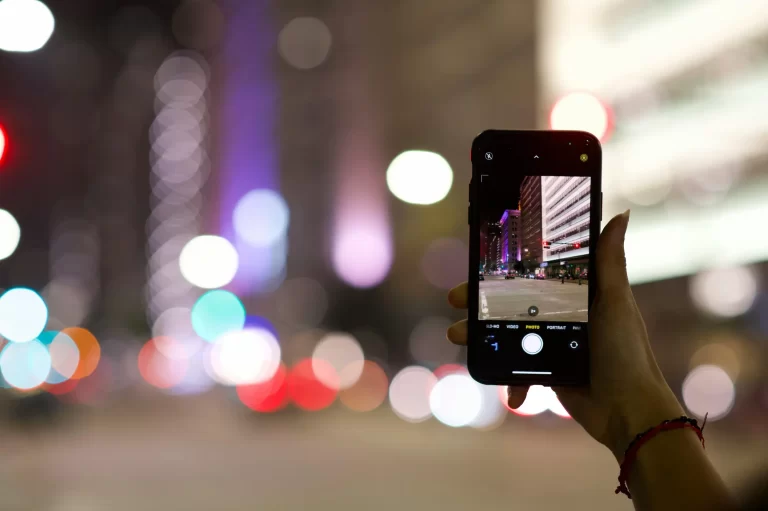
“I only shoot on my phone”—why this still matters
Even if you never touch a dial, your phone is juggling the same triangle behind the scenes. Understanding it helps you stop “mystery blur” and get cleaner, more intentional results.
What the phone is really doing
- In bright light, it prefers low ISO + quick shutter.
- In dim light, it raises ISO or lengthens shutter (hello, blur)—or uses multi-frame stacking in Night mode.
- Portrait mode fakes shallow depth with software; it’s convincing only when edges are clean and the subject is separated.
How to steer it
- Tap to focus and hold (AE/AF-Lock), then drag the exposure slider to protect highlights.
- Stabilize on a railing for Night mode; let it stack multiple frames at low ISO.
- Use “Long Exposure” or “Light Trails” modes for silky water and traffic streaks.
- Pro/Manual apps let you set shutter and ISO; start with 1/4–1s for water blur, 2–4s for light trails.
- Avoid midday long exposures on phones; do them at blue hour where light is gentle.
Knowing the triangle means you can predict when the phone will raise ISO (grainy face!), when the shutter will dip too low (blurry hands), and when to add light or brace instead of guessing.
Real scenes, real settings (Phuket-tested)
1) Freedom Beach at sunset — seascape smoothness
- Goal: Misty water, detailed rocks.
- Start: f/11 • 1s • ISO 100 on tripod, CPL to tame glare.
- Too bright? Add 6-stop ND → 4–8s for extra silk.
- Side note: Watch for moving leaves—they’ll blur at long shutter.
2) Old Town at blue hour — light trails
- Goal: Clean trails, crisp buildings.
- Start: f/8 • 10s • ISO 100 on tripod.
- Protect highlights with –0.3 EC or manual tweak; turn IBIS off on tripod.
3) Beach volleyball at noon — freeze the jump
- Goal: Stop action mid-air.
- Start: 1/2000s • f/4 • Auto ISO (cap 1600).
- Meter fooled by sand? Dial +0.3 EC.
4) Temple courtyard — people as “ghosts”
- Goal: Solid architecture, blurred crowds.
- Start: f/11 • 1s • ISO 100; shoot in shade.
- If highlights clip, step back and shade the lens or add ND.
5) Indoor café portrait — natural light
- Goal: Sharp eyes, pleasant blur.
- Start: f/2 • 1/125s • ISO 800–1600.
- If hands blur, go to 1/250s and accept ISO 3200.
Troubleshooting (fast fixes to common problems)
Everything is sharp but the picture is dark.
Open aperture (lower f-number), slow shutter, or raise ISO. In A/Av or S/Tv, use +EC.
My water blur is blown out in daylight.
Use a stronger ND (6–10 stop), lower ISO, and shoot at f/8–f/11.
Portraits look soft.
Use 1/125–1/250s, focus on the nearest eye, and avoid f/1.4 at very close distances unless you want extremely thin depth.
Night shots are noisy.
Stabilize, lower ISO, and give more shutter time. Shoot RAW if you can; denoise gently later.
Weird flicker/banding under LEDs.
Try shutter speeds that match mains frequency (1/50, 1/100 in 50 Hz regions) or switch to flicker-reduction if your camera has it.
Tripod shots still blurry.
Turn stabilization off, use a 2-sec timer/remote, and shield from wind. Check that your tripod is on firm ground (not a bouncy boardwalk).
A 40-minute practice plan (camera or phone)
Set A (15 min): Prioritize depth vs. time
- Shoot a person or statue at f/2.8, f/5.6, f/11—keep exposure constant by compensating shutter/ISO.
- Compare background separation and sharpness.
Set B (15 min): Freeze vs. blur
- Photograph moving scooters at 1/1000s (freeze).
- Repeat at 1/30s while panning (blur).
- Review keeper rate and feel.
Set C (10 min): Clean night color
- Stabilize at blue hour; shoot ISO 100 with 5–10s shutter.
- Compare noise and richness with a high-ISO, short-shutter frame.
Take quick notes in your phone. The numbers click when you see them side-by-side.
Myths that hold beginners back
- “Higher f-number is always sharper.”
Lenses have a sweet spot; too small an aperture can soften detail (diffraction). - “Stabilization solves everything.”
It helps your shake, not subject motion. - “Auto ISO is cheating.”
It’s smart. Cap the max ISO and steer the other two corners. - “Manual mode is the only ‘pro’ mode.”
Pros use A/Av and S/Tv all the time when a specific corner matters most. - “Phones can’t do long exposure.”
They can—use Night/Long Exposure and stabilize. Blue hour is your friend.
Editing to support your choices
- Frozen action: add a touch of Texture/Clarity, keep noise reduction modest to preserve detail.
- Water blur/long exposure: gentle contrast and Whites; keep Clarity low in water for silk.
- High-ISO files: denoise first, then sharpen; avoid over-smoothing skin or sky.
- Highlight recovery: expose for highlights in bright scenes; RAW gives you more room to pull back.
ETTR? Expose-to-the-Right can work for clean files, but don’t clip highlights you care about—bright water and neon signs blow quickly.
FAQ (quick wins)
What’s the best beginner mode for portraits?
Aperture Priority at f/2.8–f/4, 1/125–1/250s, Auto ISO capped around 1600–3200.
How do I choose settings for fast sports at dusk?
Start 1/1000–1/2000s, open aperture, raise ISO as needed. Don’t be afraid of ISO 6400 on modern cameras.
What’s the ideal landscape combo?
f/8–f/11, base ISO, tripod, shutter as needed. Use 2-sec timer and turn stabilization off.
Can I mix two exposures (sharp leaves + silky water)?
Yes—shoot a fast frame and a long-exposure frame from a tripod and blend in post.
Do phones have “aperture”?
Not physically adjustable on most models; “Portrait mode” simulates blur. You still control light via time and ISO (or let Night mode stack).
If you remember only five things
- Pick the story first: depth, motion, or cleanliness.
- Choose the right mode for your priority (A/Av, S/Tv, or M).
- Trade smart: open aperture ↔ faster shutter; lower ISO ↔ more light.
- Stabilize when you slow down.
- Protect highlights and refine with exposure compensation.
make it happen
Ready to put the exposure triangle to work?
- Download the Night Photography Cheat Sheet to practice long exposures without guessing.
- Prefer a friendly, structured path? Join our Capture with Confidence course for hands-on assignments and feedback.
- Want to learn in the field? Come out on a Photography Adventure Tour in Phuket—sunrise seascapes, Old Town light trails, and golden-hour temple portraits. Small groups, beginner-friendly, camera or smartphone welcome. Check dates here.
Time, light, and sensitivity—that’s all photography is. Learn to balance the triangle, and you can make any scene yours.Extended thinking
more resources
- Shutter Speed Made Simple
- Aperture for Beginners
- ISO Demystified
- Night Photography Cheat Sheet (Downloadable) →
/shop/night-photography-cheat-sheet - Capture with Confidence (Beginner Course)
Optional further reading: